Rearranging Tabs
Tabs can be rearranged in several ways: by dragging and dropping tab headers to reorder them, by grouping and ungrouping tabs, and by arranging tabs side-by-side.
Changing tab position
To change tab position among its siblings, drag the tab header and drop it in the desired location.
Using tab groups
If you work with many SQL Commander or Object View tabs, and some tabs are related to each other, you can use tab groups to organize them into distinct groups based on task, environment, or project context.
- Right-click the tab header and choose Add Tab to New Group. Once groups exist, the menu item is Add Tab to Group, where you choose New Group or an existing group. You can also drag a tab into or out of a group.
- Right-click a tab group header and choose Edit Group to change the group's name and color.
- Click the tab group header to collapse or expand the group.
- To remove a tab from its group, use Remove from Group.
- Use Ungroup Tabs in the group header menu to dissolve a group and keep its tabs, or Close Group and Tabs to close them all.
Placing tabs side-by-side
If you want to see the content of several tabs at the same time, you can arrange them side-by-side using drag and drop or the context menu.
When you drag a tab, an outline of the tab borders shows what will happen when you drop it: place it above, below or next to another tab, or move it to another location among its siblings.
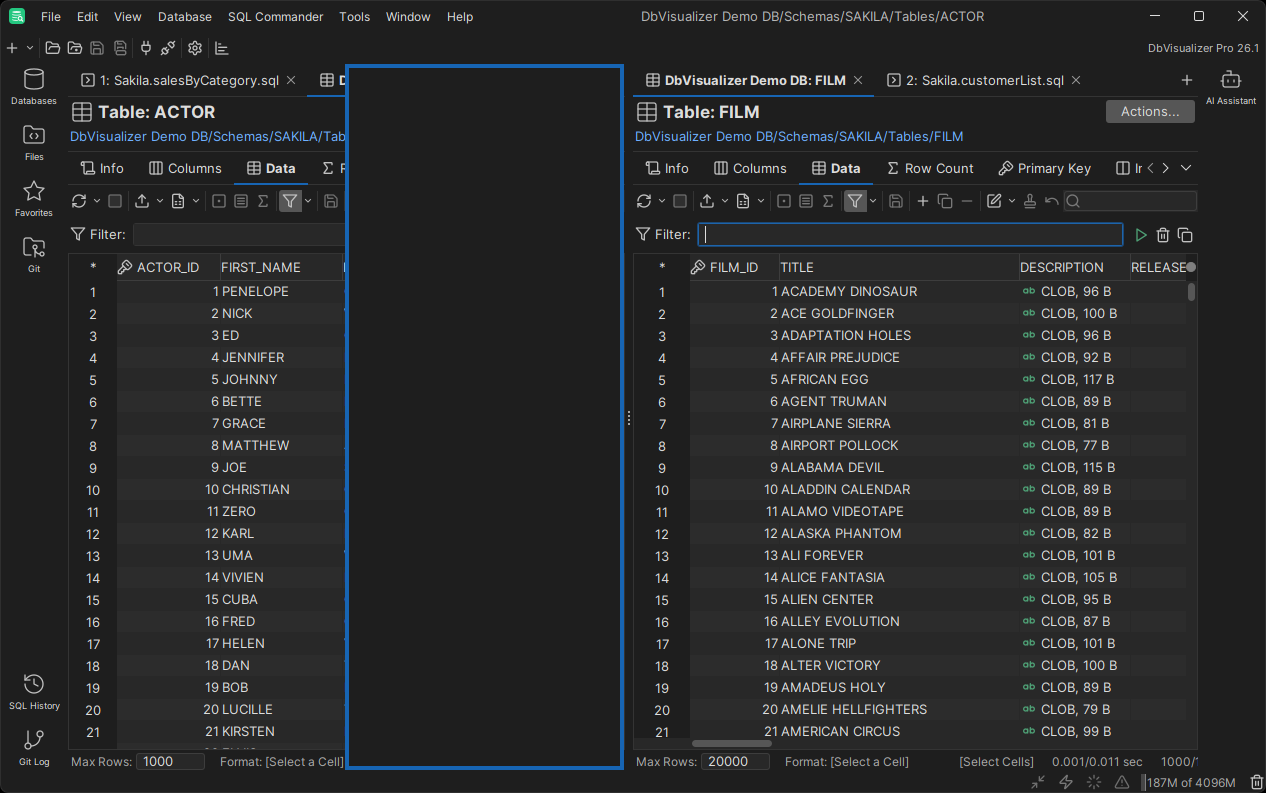
The tab header right-click menu also provides options for arranging all tabs at the same level: Tile all Tabs makes all tab content visible side-by-side, while Collapse all Tabs shows only the active tab's content.
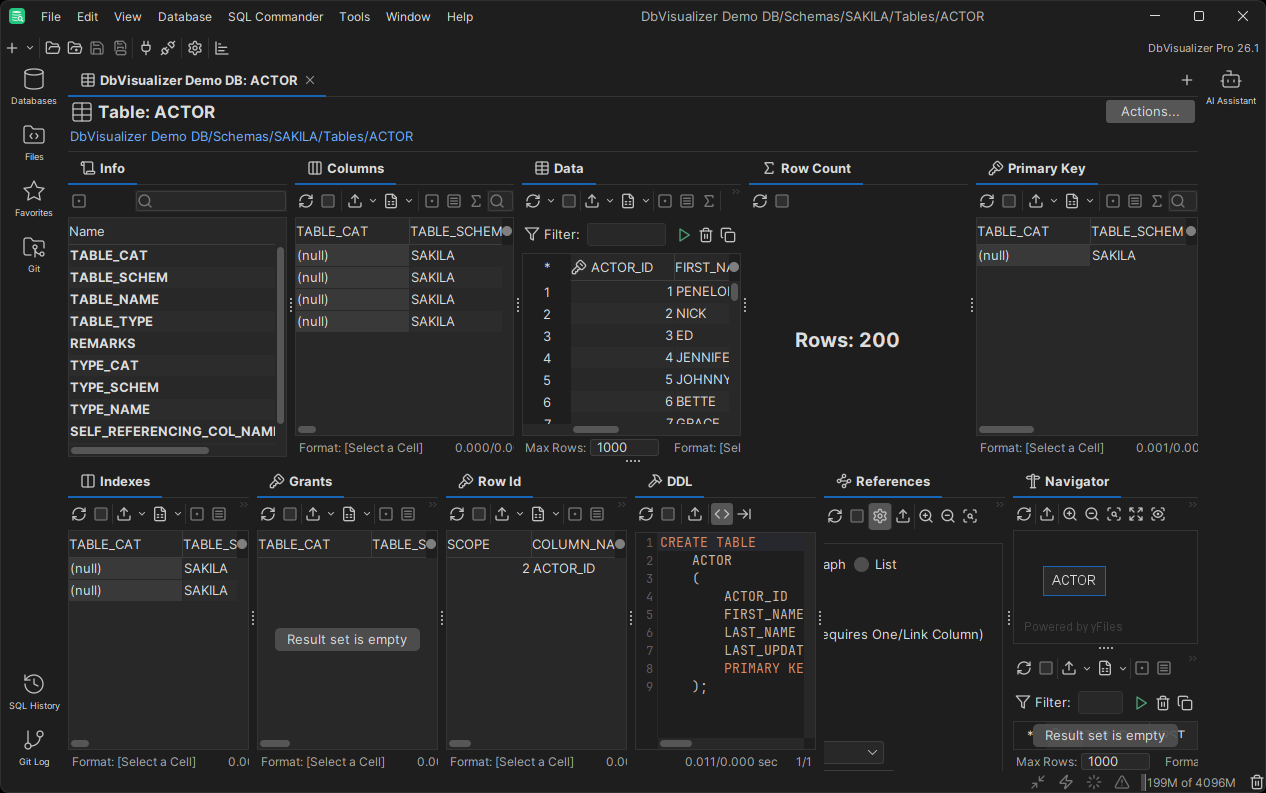
Changing the default tab layout
Only in DbVisualizer Pro
This feature is only available in the DbVisualizer Pro edition.
You can save your rearranged layout of an Object View tab so that it is applied for all objects of the same type for the same database type. In the sub tab header right-click menu, select Save as Default Layout. To restore the default layout, use Reset to Factory Layout.