Filtering Database Objects
Only in DbVisualizer Pro
This feature is only available in the DbVisualizer Pro edition.
When a database has many objects, you can choose which ones the Databases tab shows, in two ways:
- Filter objects, for example to show only the tables whose names start with
SALES. - Hide object types, for example indexes or synonyms, that you don't use.
The filters are saved per connection, and are kept when you restart DbVisualizer.
Opening the Filter Editor
You set up filters in the Filter Editor. To open it, select a node of a connected database in the Databases tab, and then do one of these:
- Select Database → View → Database Objects Filters → Open Filter Editor.
- Right-click in the tree and select View → Database Objects Filters → Open Filter Editor.
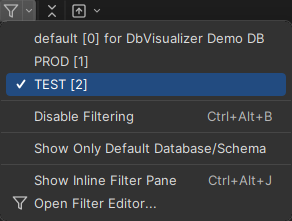
- Click the arrow of the filter button (the funnel) in the Databases tab toolbar, and select Open Filter Editor.
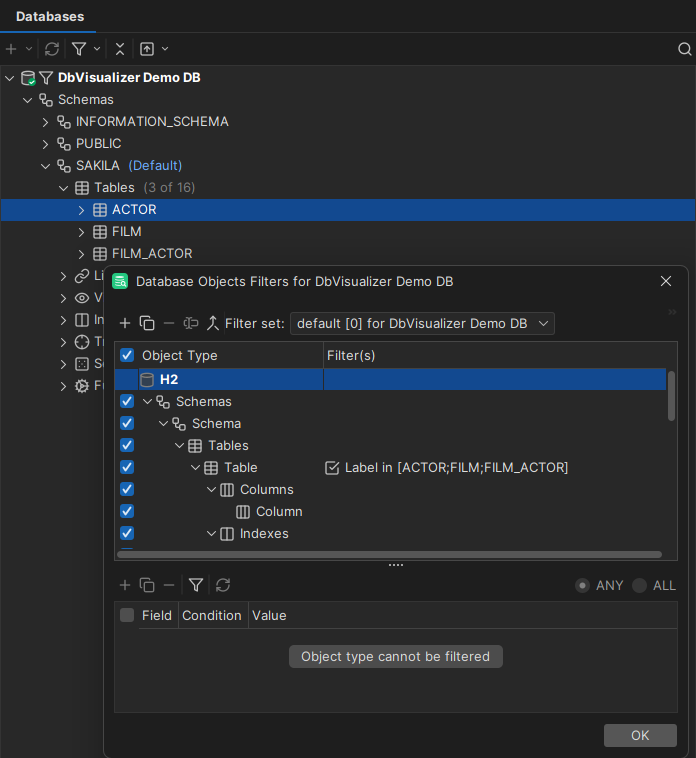
The upper list shows the object types of the database. The check box in front of a type shows or hides it in the tree, and the Filter(s) column shows the filters for the type. A check mark means that a filter is in use, and a cone means that all filters for the type are turned off.
Filtering objects
You can filter single objects, such as tables or procedures, but not group nodes, such as Tables or Procedures. To add a filter:
- In the upper list of the Filter Editor, select the object type.
- In the lower part, click the plus button to add a row.
- Choose the field, such as the name, and the condition, and enter the value. For conditions with several values, such as is in, separate the values with semicolons.
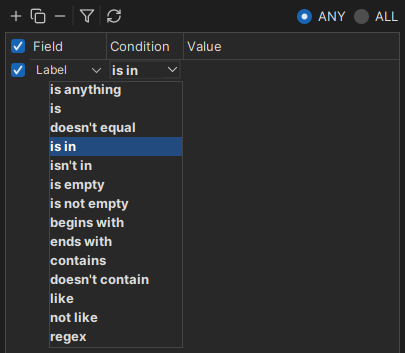
To add more conditions, add more rows, and choose whether the objects must match ALL or ANY of them. To turn a condition off without removing it, clear its check box. To change the order of the rows, drag them, or right-click and select Move Up or Move Down.
Filters for databases and schemas also apply to the lists in SQL Commander, after you reconnect.
Filtering below the tree
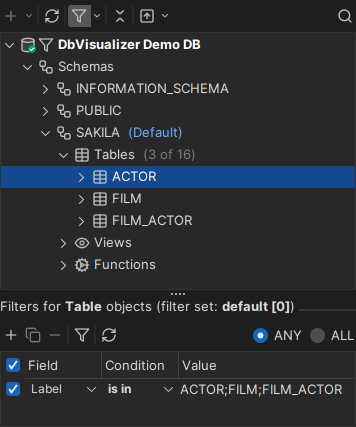
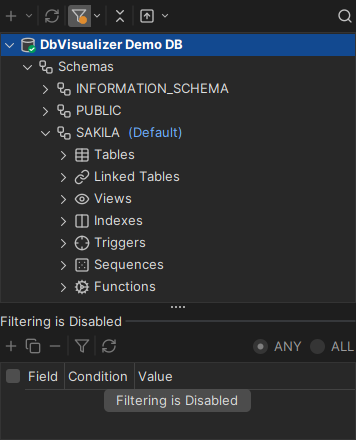
To set up filters without opening the Filter Editor, show the filter area below the tree: click the left part of the filter button in the Databases tab toolbar, or select Show Inline Filter Pane in its menu. The area shows the filters for the object type of the selected node.
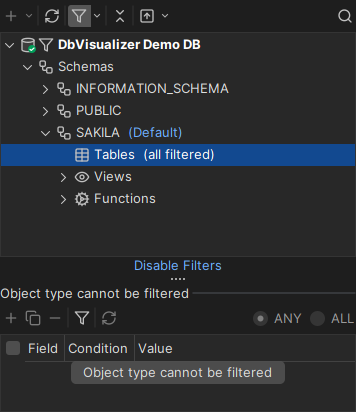
After you change a filter, reload the tree using one of the reload buttons. If a filter hides all objects of a type, "(all filtered)" is shown next to the group node. To see the objects again, select the group node and click Disable Filters below the tree. This turns off the filters for the type and reloads the tree, so that you can change the filters. If all object types under a node are hidden, the link is Edit child objects visibility, which opens the Filter Editor.
Hiding object types
Some databases have many object types that you rarely use. To hide an object type, clear its check box in the upper list of the Filter Editor.
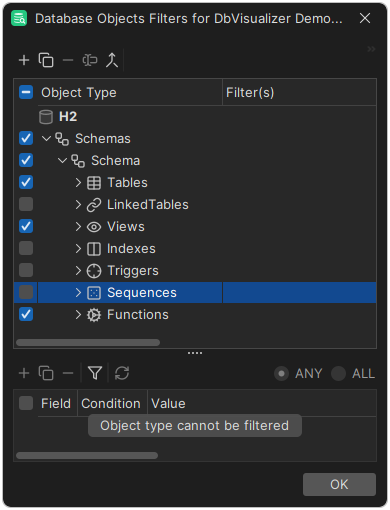
| All object types | With hidden object types |
|---|---|
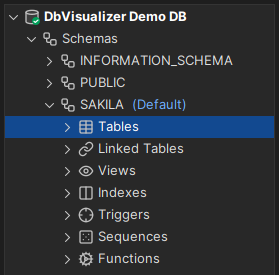 | 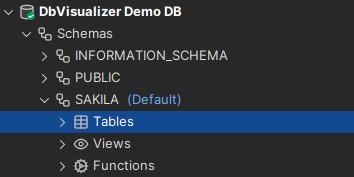 |
Turning filtering off
To see all objects for a while, select Disable Filtering in the menu of the filter button. This applies to the current connection only. The filter button then shows an orange mark, and you can't change filters until you turn filtering on again.
Showing only the default database or schema
To show only the database or schema that the connection uses by default, select Show Only Default Database/Schema in the menu of the filter button.
Using filter sets
Your filters and hidden object types are saved in a filter set. Each connection has a default filter set. You can also create filter sets of your own, and share them between connections to databases of the same type, for example all your MySQL connections.
To create, duplicate, rename, delete or merge filter sets, use the buttons next to Filter set in the Filter Editor. Merging imports the filters from another changed filter set of the same database type, including the default filter set of another connection.
To switch filter set, select it in Filter set in the Filter Editor, or in the menu of the filter button. The filter set in use is checked.
Changing object labels
The label of an object in the tree is built from variables. For example, a column is shown with its name and data type:
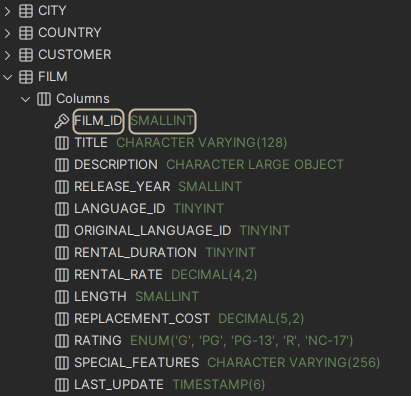
To change the labels, select Labels at the top of the Filter Editor. The Label column is the main label, and Label1 is the text after it. For example, the Label1 of a column is ${getColumnDefinitions.TYPE_NAME}. To show the column comment instead, change it to ${getColumnDefinitions.COMMENT}.
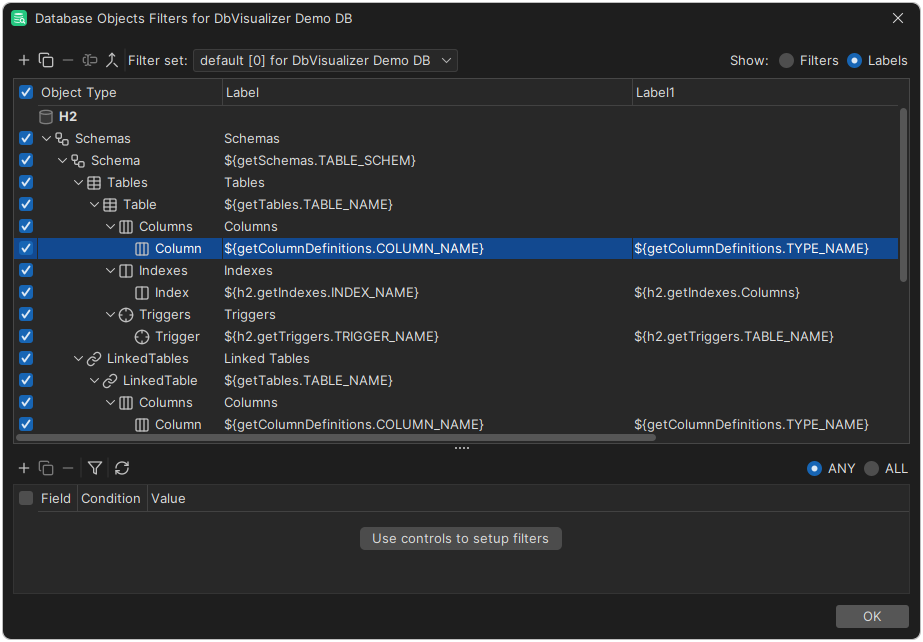
You rarely need to change the Label column. The variables you can use depend on the database and the object type. For a column, they include COLUMN_NAME, SIZE, SCALE, TYPE_NAME, NULLS, AUTO_INCREMENT, ENCODING, COMMENT, IS_INVISIBLE, COLUMN_DEFAULT and IS_PRIMARY_KEY.