Adding users to your organization
There are two ways for someone to appear on your Users page. Both give you a person you can assign a seat to. Owners and admins can add people; members cannot.
1. Invite them manually
Recommended when you want to add specific people right away.
- Go to Users in the left sidebar.
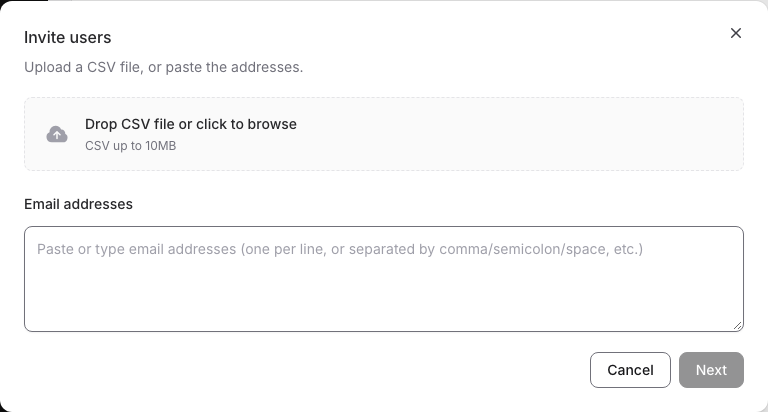
- Above the list of people, click Invite users.
- Type or paste the email addresses into Email addresses, one per line or separated by commas, semicolons or spaces. To add many people at once, drop a CSV file (up to 10 MB) on Drop CSV file or click to browse instead (see Uploading a CSV).
- Click Next.
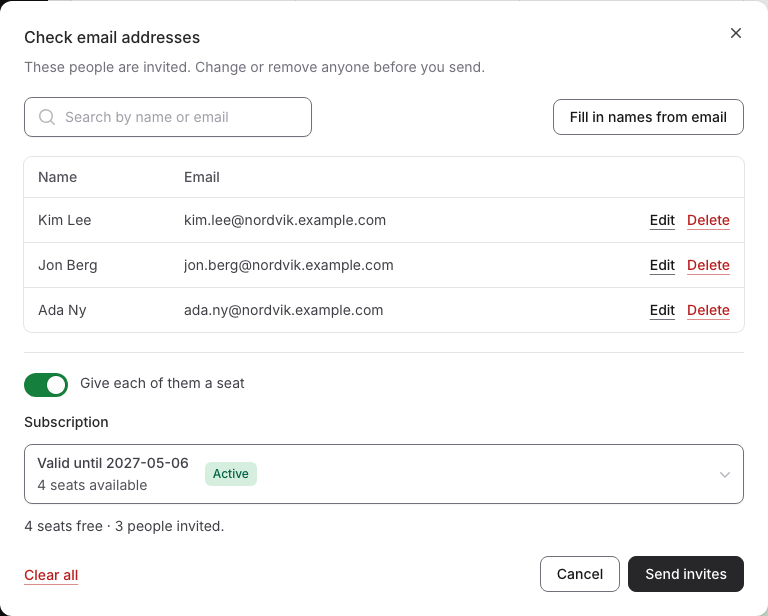
- On Check email addresses, look over the list. Edit or Delete a row, or click Fill in names from email to fill in each name from the part of the address before the @.
- Leave Give each of them a seat on and choose the Subscription if the people should get a seat right away, or turn it off to only invite them. The switch starts on when one subscription has a free seat for everyone in the list. The line below it shows how many seats are free and how many people you invite; if there are not enough seats, pick another subscription, invite fewer people, or turn the switch off.
- Click Send invites. For a long list a progress bar shows how far it has come: keep the window open until it is done.
Each person gets an email with a link to join your organization in the User Portal. If you gave them a seat, the same email tells them about it. They appear on your Users page right away: with the status Active if they got a seat, otherwise Invited until they sign in.
If an invitation doesn't arrive
Find the person on the Users page, open the ··· menu at the end of their row and choose Resend invitation, then confirm. They get a new email to join the organization. The option is there until the person has signed in.
Uploading a CSV
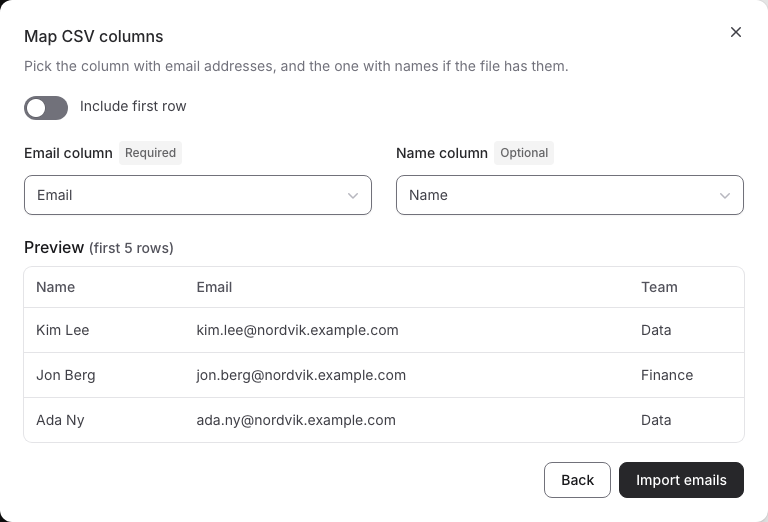
After you drop a CSV file, the Map CSV columns step opens:
- Email column (required): the column with the email addresses.
- Name column (optional): the column with names, or None.
- Include first row: turn this on when the file has no header row, so its first row is read as a person too.
A preview shows the first five rows. Click Import emails to go on to Check email addresses, or Back to start over.
2. Automatic onboarding via DbVisualizer
People who already have one of your licenses installed on their computer are added to your Users page automatically once they sign in to DbVisualizer. In other words, if you have existing DbVisualizer Pro users, they show up in the User Portal with their seat as soon as they sign in to the DbVisualizer desktop application. If you have a long history with multiple orders, you may need to contact sales@dbvis.com to make sure all your existing users are listed correctly.
Sign-in is required
Automatic onboarding only happens once the person has actually signed in inside DbVisualizer. Installing or opening the application is not enough: the sign-in is what registers them in the User Portal.
User roles
Everyone in your organization has one of three roles. Owners and admins have a badge next to their name on the Users page.
| Role | What they can do |
|---|---|
| Owner | Everything an admin can do, and also decide who is an admin and hand over ownership. An organization has one owner. |
| Admin | Invite people, give them seats and take seats back, buy and pay for subscriptions, and change the organization's settings. Admins cannot change anyone's role. |
| (no badge) | A member. Uses their seat in DbVisualizer. The portal sidebar shows them only License and Contact. |
Owners and admins see Overview, Subscriptions, Billing, Users, Settings and Contact in the sidebar, and License too when they hold a seat themselves.
Changing roles
Only the owner changes roles. On the Users page, open the ··· menu at the end of a person's row:
- Make admin: gives a member admin rights.
- Remove admin: makes an admin a member again. They keep their seat if they have one.
- Make owner: hands over ownership to an admin. The current owner stays on as an administrator, and from then on only the new owner can change who is an administrator or owner. To make a member the owner, make them an admin first.
Each action asks you to confirm. To change several people at once, tick them in the list and use Bulk actions, which offers Make admin and Remove admin, and Make owner when one admin is selected.
To make someone an admin who is not in the list yet, open the Admins tab and click Add admin. Enter their Name and Email and click Add admin: someone already in the organization is given admin rights, anyone else is invited and made an admin.
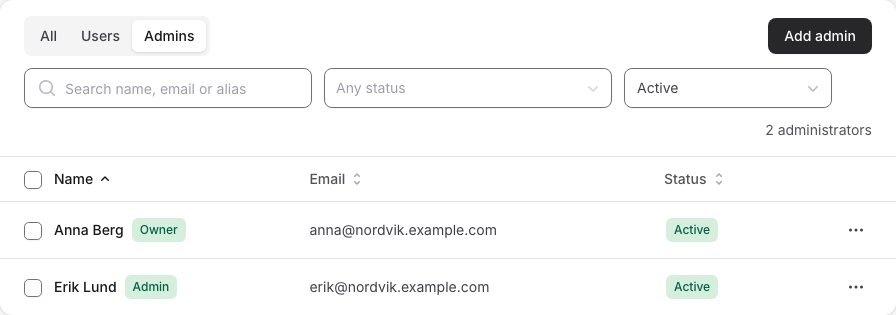
An admin who opens the Admins tab sees who the owner is and a note that only the owner adds and removes administrators.
Emails about roles and seats
A new admin or owner gets an email about their role. When you give a seat to an owner or admin who has not yet had an email from your organization, they get the email about their role and a separate email about their seat, instead of the invitation members get.