Adding users to your organization
There are two ways for someone to appear in your Users list. Both result in a user you can assign a seat to.
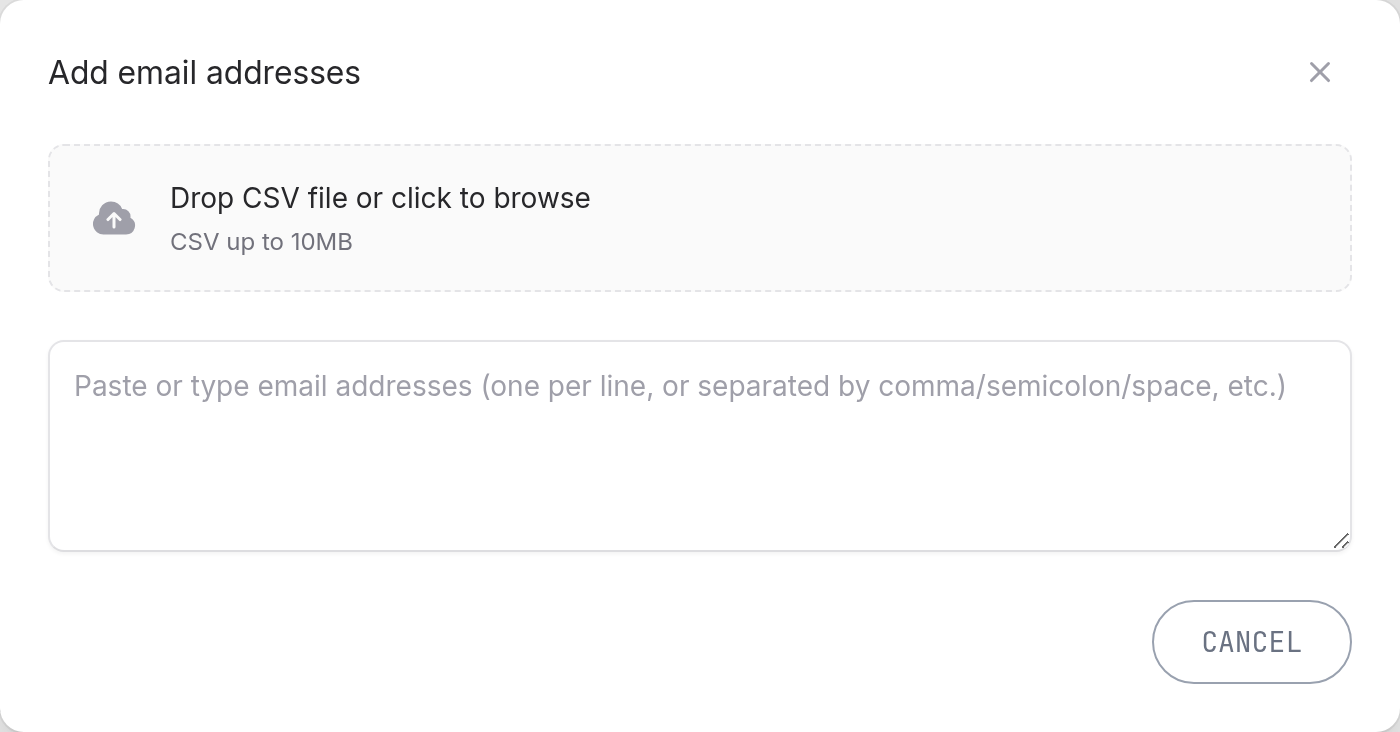
1. Invite them manually
Recommended when you want to add specific people right away.
- Go to Users in the left sidebar.
- Under Total users, click Invite users.
- Add the email addresses of the users separated by commas, semicolons, spaces, or new lines. You can also upload a CSV file (up to 10 MB) to add many users in one go.
- Click Next.
- On the Check email addresses step, review the list. You can edit or delete rows, and optionally turn on Generate 'Name' from email to pre-fill display names from the local part of each address.
- Click Send Invites.
Each user will receive an invitation email to the User Portal with a link to create their account. Once the account is created, they appear in your Users list.
If an invite doesn't arrive
Find the invitee's row in the Users table and select Reinvite User from the row's action menu.
Uploading a CSV
After uploading a CSV file you'll be asked to select which column contains email addresses (required) and, optionally, which column contains names. Click Import Emails to proceed to the review step.
2. Automatic onboarding via DbVisualizer
Users that already have one of your licenses installed on their computer can be automatically added to your Users list once they sign in to DbVisualizer. In other words, if you have existing DbVisualizer Pro users, they can get listed on your Users list in the User Portal automatically with a claimed seat, as long as they sign in to the DbVisualizer desktop application. If you have a long history with multiple orders, you may need to contact sales@dbvis.com to ensure all your existing users get correctly listed.
Sign-in is required
Auto-onboarding only triggers once the user has actually signed in inside DbVisualizer. Simply installing or opening the application is not enough; the sign-in is what registers them in the User Portal.
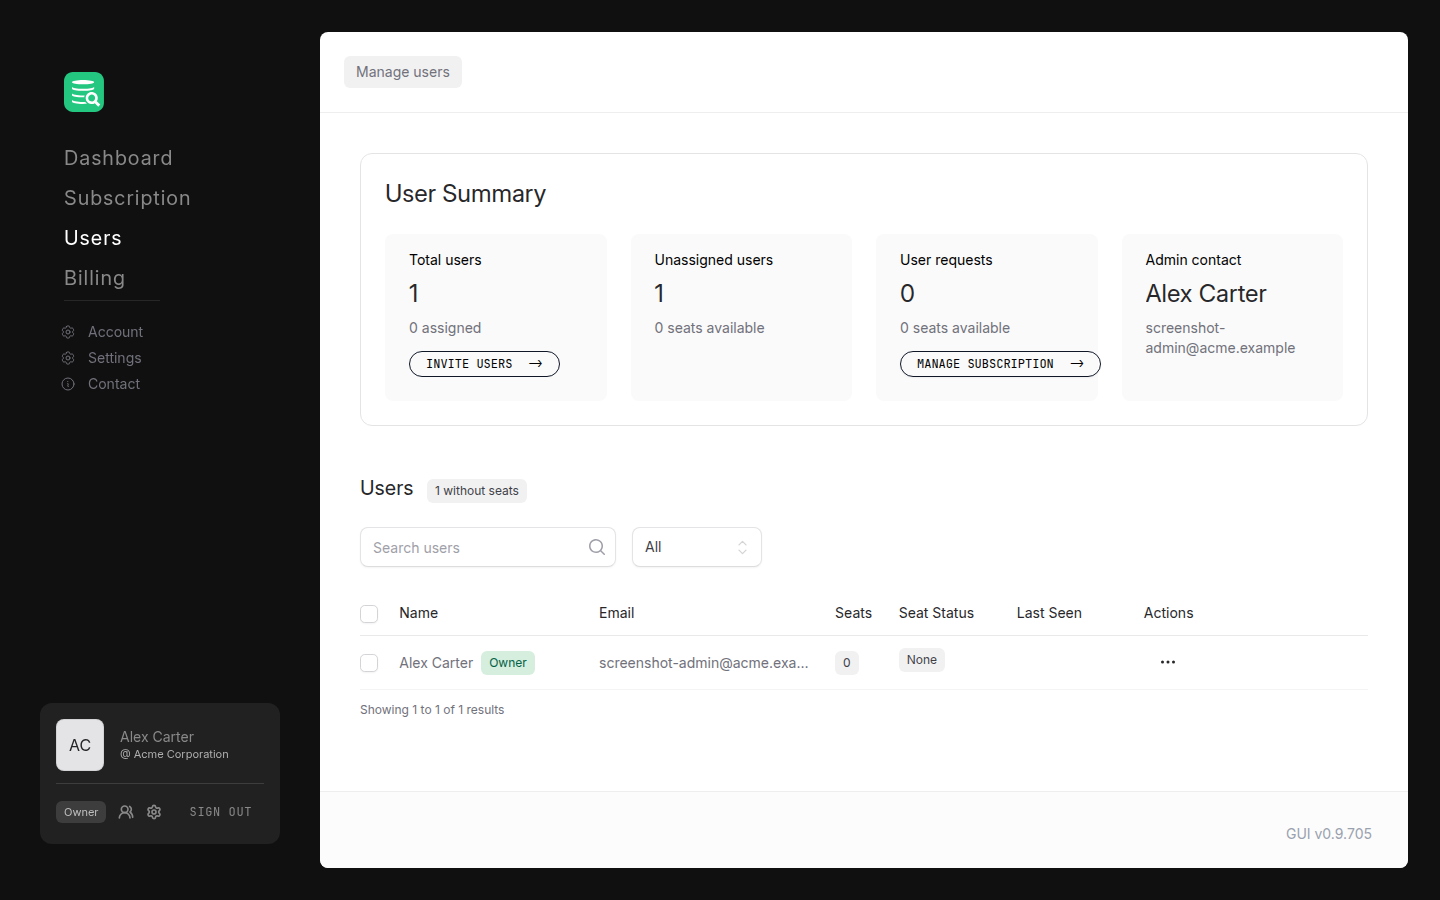
User roles
Every user in your organization has one of three roles, shown as a badge in the Users table:
| Role | What they can do |
|---|---|
| Owner | Full access; can transfer ownership, manage admins, and all admin actions. Only one owner per organization. |
| Admin | Can invite users, manage seats, and manage other users. Cannot transfer ownership. |
| (no badge) | Regular member. Can use their assigned seat in DbVisualizer. No portal management rights. |
You can promote a regular member to Admin (or demote an Admin back to member) by selecting them in the table and using Bulk Actions → Make Admin or Remove Admin. To transfer ownership to an administrator, select them and choose Make Owner. This can only be done for one user at a time and is irreversible.
