intro
Assume you manage inventory in an e-commerce company. Due to the increased number of orders, manually updating the inventory is becoming time-consuming and leading to mistakes such as typos or incorrect quantities.
To improve productivity and data accuracy, you can automate the process of updating inventory levels based on incoming orders. Automating the e-commerce inventory management will ensure that product availability is up-to-date without manual intervention.
In this tutorial, you will learn how to automate the process of e-commerce inventory management using DbVisualizer, an SQL CLI and SQL job scheduling tool.
Prerequisites
To follow along with this tutorial, you will need the following:
We will start by connecting Postgres to DbVisualizer, creating a database for the e-commerce store, and importing data into the database.
Connecting Postgres to DbVisualizer
Step 1: Start DbVisualizer and click the Create a Connection button as shown below.

Step 2: Search for Postgres and double-tap the Postgres driver from the popup menu on the left side of your screen, as shown below.

An object view tab for the Postgres connection is opened.

Step 3: Fill in the database connection name field with “AutomatingSQL,” or the name of your choice as shown below.

Fill in the Database Userid field with “postgres” and the Database Password field with your password (we use “test123”, you should use a stronger one) as shown below.

Once done, click the Connect button at the bottom, and if there are any issues, they will be displayed under the Connection Message section.

If the connection is successful, you should see the newly created AutomatingSQL connection on the left sidebar of your screen.
Creating a database for the e-commerce store
Creating a database in Postgres using DbVisualizer is a simple and straightforward process. Follow the steps below to learn how to create a database in Postgres using DbVisualizer.
Step 1: Open the AutomatingSQL tab tree, right-click on Databases, and select the Create Database option as shown below.

Step 2: On the pop-up window that appears, fill in the fields as shown below, and then click the Execute button to create the database.

If you look at the AutomatingSQL connection, you will see the database ecommercedb has been created.

Next, we need to import data into the ecommercedb using DbVisualizer.
Importing data into the ecommercedb database
Now that you have learned how to create a database in Postgres using DbVisualizer, let’s now import some data into the database by following the steps below.
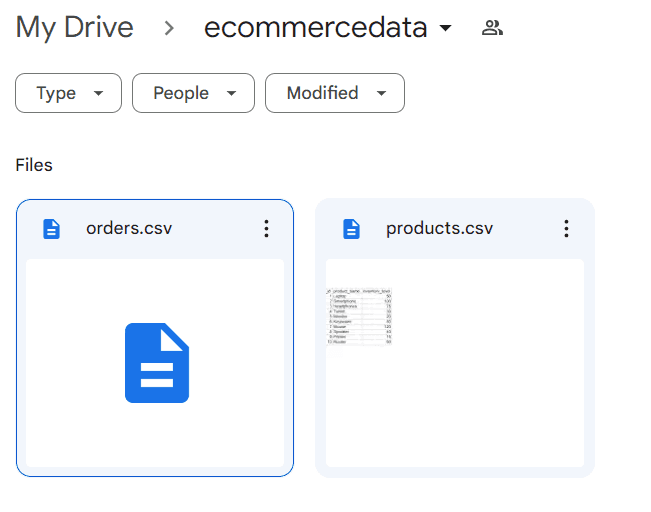
Step 1: Navigate to this Google Drive Link and download the eCommerce store inventory dataset.
Step 2: Open the database connection AutomatingSQL in DbVisualizer. To import data, right-click on the Tables tab tree and select Import Table Data, as shown below.

Step 3: On the popup window, navigate to the directory you downloaded the eCommerce store inventory dataset CSV file into, select the products file and click the Open button.

Step 4: Keep clicking the Next button below the popup window until you reach the window below where you need to create a New Database Table.

Step 5: On the popup window, give the table that will hold the products data a name. In this case, I have named my table products as shown below.

Step 6: Next, check the Use Delimited Identifiers checkbox at the bottom of the pop-up window to help PostgreSQL differentiate any column name from its reserved keywords.

Step 7: Click the Next button and then import the dataset into the ecommercedb database. If the data is imported successfully, you will get a Success message, as shown below.

Step 8: Repeat the same process and import table data from the orders CSV file to create an orders table. Once done, right-click the Tables tab and select Refresh Objects tree.

You should see the products and orders tables created, as shown below.
.](https://www.dbvis.com/wp-content/uploads/2023/09/geSPz2ekm9Epj5ABkESTwa7TkC2ERdKRb8u4FrUOPSp7VwAyOdzckRtXUCQ0A25kJHrOMH-UwCkAcgJEgu0o8BQsKmWDS_a_cZn5nEKr8qVXioH5bvL4IcVfX-PAvSLwUxl7n8j3zIbjqr-kPqDj-Bo.png)
Products and orders tables in DbVisualizer.
Next, let us create an SQL file that updates the inventory_level in the products table by subtracting the ordered quantity from the current inventory level for each product in the orders table.
Creating the SQL file
In this section, you will learn how to create an SQL file that contains an SQL query that manages the e-commerce inventory.
Step 1: Write an SQL query that updates the inventory levels based on incoming orders. Here is an example.
                    1
                    UPDATE products


                    2
                    SET inventory_level = inventory_level - o.quantity


                    3
                    FROM orders o


                    4
                    WHERE products.product_id = o.product_id;
The SQL query above updates the inventory_level in the products table by subtracting the ordered quantity from the current inventory level for each product in the orders table.
Step 2: Open an SQL editor in DbVisualizer using the (Ctrl+T) keys, and execute the query above using the (Ctrl+Enter) keys to test if it works.

Step 3: Create an SQL file using (Ctrl+S) keys and name the file inventorymanagement. Then click the save button to save the file.

Generating an automation script
In this section, you will learn how to create an automation script that contains the SQL file created earlier to manage the e-commerce inventory.
Step 1: Open the command line script generator using the (Ctrl+Alt+G) keys in DbVisualizer.

Step 2: Select the Use Anonymous Connection option on the script generator. An anonymous connection will enable and disable connection options accordingly.

Step 3: Click the Copy button to copy the script generated.

Step 4: Open the command line and paste the script copied.

Step 5: In the script, change the -password “#UNDEFINED” to -password “test123” or to the password of your database connection. Note that providing passwords over the CLI isn't very secure. Passwords can be observed by anyone who reads the CLI history.

Step 6: Press Enter to test the script works. If it works, you should get [1 successful, 0 errors] message on the command line as shown below.

Next, let us schedule the script to run every day using the Task Scheduler.
Scheduling query execution using Windows Task Scheduler
Step 1: Start the Windows Task Scheduler and choose the action "Create Basic Task".

Step 2: Give the task a descriptive name (e.g. EcomInventoryManagement) and press Next.

Step 3: Choose the trigger type (e.g. daily) and press Next

Step 4: Enter the start time and value press Next (here we set up a task to recur every day):

Step 5: Specify the action to perform and click Next.

Step 6: Copy the script you run on the command line. Then paste it under the Program/Script option and click next.

Step 7: Click the Yes button on the popup that appears.

Step 8: Click the Finish button to schedule the script execution.

Conclusion
In conclusion, automating SQL query execution through the use of tools like DbVisualizer, an SQL CLI, and SQL job scheduling provides a streamlined process to database management. By integrating these tools, businesses or organizations can enhance productivity and data accuracy.
We hope that you’ve enjoyed this blog and that you will stick around for more content - have a read through other blogs on our website, and we’ll see you in the next one.