intro
This article explains how to join three or more tables with SQL and how DbVisualizer can help you to achieve the goal - have a read!

Preface
As a data analyst or developer, understanding how to join multiple tables with SQL is a critical skill for effectively querying and manipulating data. In many cases, data is stored across multiple tables in a relational database, and combining this data requires joining the tables together based on a common key or set of keys. This process of joining tables allows for more complex queries and powerful insights, as well as the ability to create views and reports that span multiple sources of data. This article will guide you through joining multiple tables with DbVisualizer.
Getting Started
Let us get started with using DbVisualizer to connect to our server by following the step-by-step guide below:
Step #1: Connecting To The Database Server
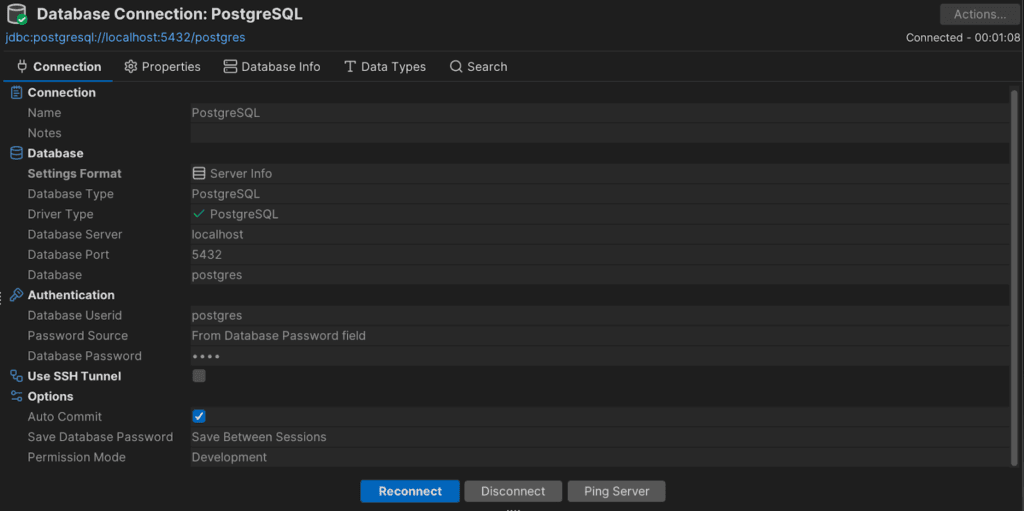
Firstly, we will need to employ DbVisualizer to establish a connection to our database server. In today’s lesson, we will be using the Postgres database server. We can establish a connection to a database server in DbVisualizer by creating a new database connection from the "Create Database Connection" menu, selecting a driver for your database, entering the connection details such as the name, database type, server IP, port, user account, and password and clicking "Connect" to access the database as shown in the image below:
Once you have successfully created the database connection, a list of all Postgres database connections will appear on the left pane of the DbVisualizer window as shown here:

Step #2: Creating The Database
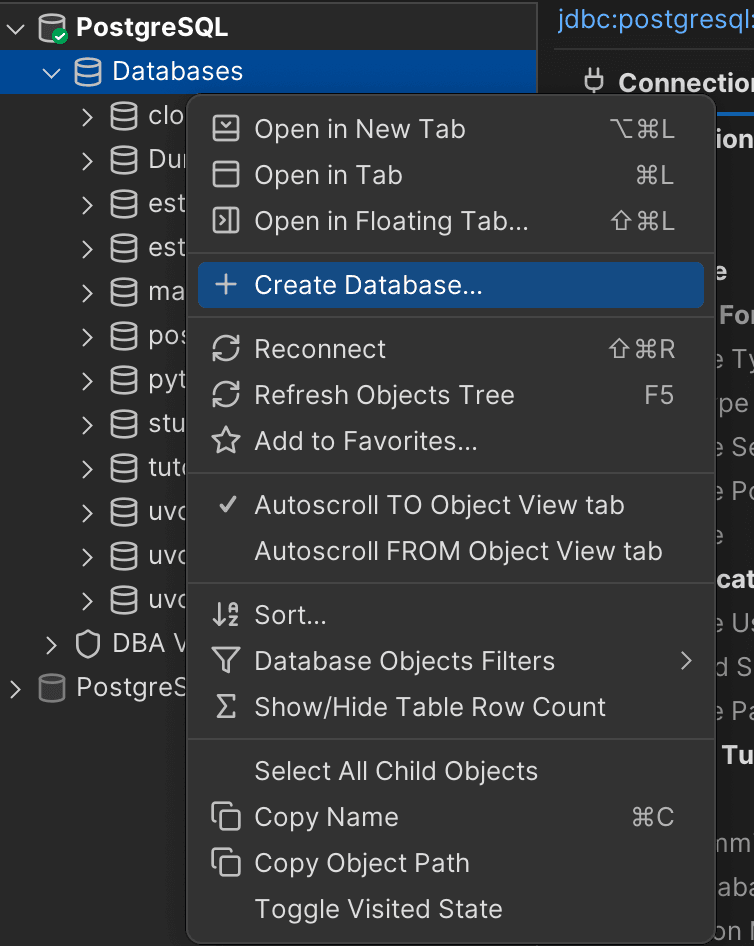
Now that the connection to the database server has been initiated, it’s time to create a new database for this particular tutorial. This can be done by right-clicking on the database node and selecting ‘Create database’ from the menu as shown below:
Pretty easy right? Let us continue by creating the database table that will be very useful in this tutorial.
Step #3: Creating The Database Table
Once you connect to the database server and create a database, you will need to create tables within that database.
All you will need to do is to navigate to PostgreSQL Connection ->Databases ->Tutorial(name of the database created) -> Schema-> public-> Tables, then right-click and select the ‘Create Table’ option as shown in the image below:

The “Create Table” dialog will be displayed after clicking the “Create Table” option. Next, give your database a name and add columns by using the ‘+’ button located on the right side of the dialog. Once you’re done customizing your table, it's time to execute it by clicking the ‘Execute’ button.

You should now be able to find the created table in the list of tables in your database by opening the ‘Tables’ tree in the database.

Step #4: Importing Table Data
Since we’re going to deal with data in this tutorial, let us import a dataset we can work with in this tutorial. To import the data into your newly created table, select the "Import Table Data" option from the right-click menu of the ‘employees’ table node. An import wizard will come up, allowing you to import data from any source, including Excel and CSV files.

Next, import the data by selecting the data file from your computer as shown below:

Navigate through the import wizard by continuously clicking on the "Next" button until you reach the final window. Now, initiate the import process by clicking on the "Import" button. If all goes well, you will find a success indicator in the import log indicating that your data has been imported successfully.

Great! Your database will now be populated with data from the CSV file you imported and would be displayed in DbVisualizer as shown below:

Since we are talking about three or more tables, go on and create three tables and import data into each of them for the purpose of this tutorial by following the exact same steps we have employed. This should be a hitch-free process, so don’t fret! In my case, I have added two extra tables named ‘department’ and ‘detail’ as shown:
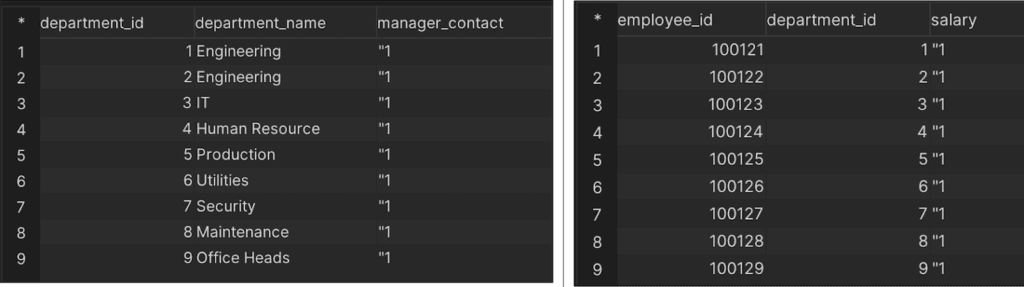
‘Department’ and ‘Detail’ Tables
Joining The Tables with SQL
Now that our database has more than two populated tables, let us learn how to join our tables. By harnessing the power of SQL, we have the ability to create queries that would join these tables together. Let’s look at how we can achieve this:
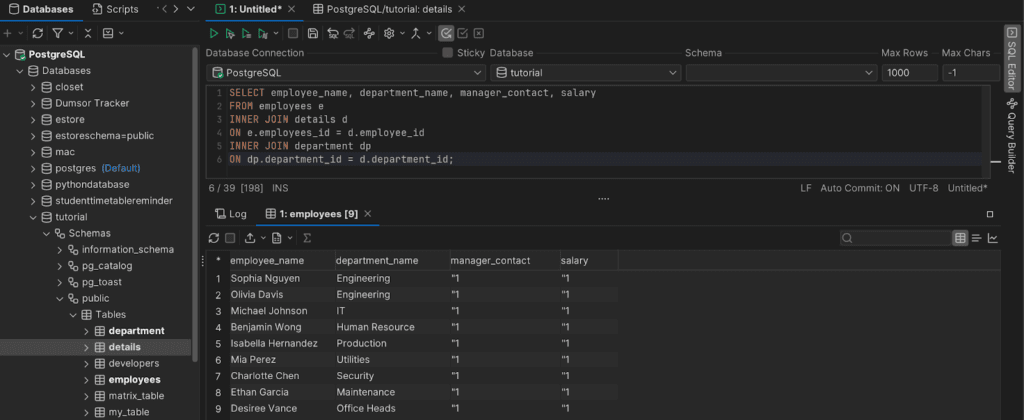
From the tables created above, we want to join the three tables together. Let us, therefore, build a query that will join the three tables by first selecting whatever column we would want to print, joining the tables ‘employees’ and ‘details’ based on the common ‘employee_id’ attribute, and then finally joining the ‘department’ table to the ‘details’ table based on the common ‘department_id’ attribute.
                    1
                    SELECT employee_name, department_name, manager_contact, salary


                    2
                    FROM employees e


                    3
                    INNER JOIN details d


                    4
                    ON e.employees_id = d.employee_id


                    5
                    INNER JOIN department dp


                    6
                    ON dp.department_id = d.department_id;
Running the query above will provide you with the results seen in the table below:
Great! We have successfully joined three tables with a JOIN. But that is not all, let us try out another method known as the Parent-Child relationship method.
The parent-child relationship method of joining three tables involves using a common column that acts as a parent in one table and a child in another table to join the tables together.
                    1
                    SELECT employee_name, department_name, manager_contact, salary


                    2
                    FROM employees e, details d, department dp


                    3
                    WHERE e.employees_id = d.employee_id  AND


                    4
                    d.department_id = dp.department_id;
The SQL query uses a parent-child relationship to join three tables: employees, details, and department. The employees table is the parent table, the details table is the child table while the department table is another table being joined.
The employee_id column in the employees table and the details table acts as the parent and child column, respectively. Similarly, the department_id column in the details table and the department table act as the parent and child columns, respectively.
The WHERE clause specifies the conditions for joining the tables based on the matching values of the employee_id and department_id columns in the employees, details, and department tables.
Running the query above will provide you with the results seen in DbVisualizer below:

Pretty cool yeah? You can also join three or more tables by using subqueries. Look at that in the section below.
To join three or more tables using a subquery, you can use a nested SELECT statement to retrieve data from one table based on the values in another table, and then join the results of the subquery with the remaining tables in the outer SELECT statement.
For an example showing how to join three or more tables with subqueries, let us build a subquery that will retrieve the department_id, department_name, and manager_contact columns from the department table. The subquery is then joined with the details table on the department_id column, and the resulting table is joined with the employees table on the employee_id column.
                    1
                    SELECT e.employee_name, d.department_name, d.manager_contact, dt.salary


                    2
                    FROM employees e


                    3
                    INNER JOIN details dt


                    4
                    ON e.employees_id = dt.employee_id


                    5
                    INNER JOIN (


                    6
                    SELECT department_id, department_name, manager_contact


                    7
                    FROM department


                    8
                    ) d


                    9
                    ON dt.department_id = d.department_id;
Running the query above will provide you with the results seen in DbVisualizer below:

Conclusion
In this article, we looked into the process and essence of setting up a database connection. We also explored the various options for joining multiple tables from using JOINs, to using the Parent-Child relationship method and to using Subqueries.
By following the instructions outlined in this article, you will be able to make meaningful deductions from several datasets within a span of tables that will help you understand your data better and communicate your findings to others.
Now that you have a grasp of this concept, it's time to put your newfound knowledge to test. However, do note that joining multiple tables with SQL is not everything you need to know. While SQL is a powerful tool for querying and manipulating data, there are many other aspects of database management that are equally important, including data modeling, database design, and performance tuning which can all be tackled effortlessly using SQL clients like DbVisualizer.
FAQs
What are some best practices for joining multiple tables with SQL?
Some of the best practices for joining multiple tables with SQL include: using aliases for table names to improve readability, specifying join conditions explicitly to avoid ambiguous unexpected results, avoiding unnecessary joins or subqueries to improve performance, using appropriate indexing to speed up query execution, and testing the query with sample data before running it on production data to ensure accuracy.
What is the advantage of using subqueries to join multiple tables with SQL?
Subqueries can be useful when joining tables that have complex or nested relationships, or when you need to filter or group data based on values in another table. They can also help simplify the query and make it easier to read and understand.
Why do we need to join multiple tables with SQL?
Joining multiple tables with SQL allows us to combine data from different tables and create more meaningful and useful insights. Joining tables can help identify and resolve data inconsistencies and ensure that the data is accurate.