intro
In Oracle, a database link is a pathway that enables the transfer of data between two separate databases. This allows users to access remote data as if it were stored locally, making it a valuable tool for organizations that need to centralize their data management and share information between different systems and departments.
DbVisualizer is a user-friendly database management software with a graphical interface for working with databases, including Oracle. One of its many capabilities is the ability to create and manage database links, making it an efficient and convenient tool for performing operations that make use of this pathway.
This article will guide you through the process of creating a database link in Oracle using DbVisualizer, including important tips and tricks to help you avoid common issues and make the most of this powerful tool.
What is a Database Link in Oracle?
In Oracle, a database link is a connection that allows users to access data from a remote database as if it were stored locally. It acts as a bridge between two databases and eliminates the need for copying data to multiple locations. All database links are identified by a unique name and can be accessed by prefixing the table name with the link name. They simplify data management by allowing centralized access to remote data and sharing information between different systems and departments.
Why are Database Links Important?
Database links play a crucial role in modern organizations for several reasons:
Types of Database Links in Oracle
In Oracle, there are two types of database links: private and public.
Private links are created for a specific user or schema and can only be accessed by that user or schema. It is established using the CREATE PRIVATE DATABASE LINK command.
Public links are accessible to all users and schemas in the local database and can be used by anyone with the necessary privileges.
The choice between private and public links depends on the level of security and accessibility required for remote data. It is set up using the CREATE PUBLIC DATABASE LINK statement.
Creating a Database Link in Oracle with DbVisualizer
Creating a database link in Oracle using DbVisualizer is a simple and straightforward process. By following a step-by-step guide, you can easily establish a connection between two separate databases, allowing you to access remote data as if it were stored in your local database.
1. Installation of Oracle Database
First, we need to download the Oracle database on our local machine from the Oracle website.
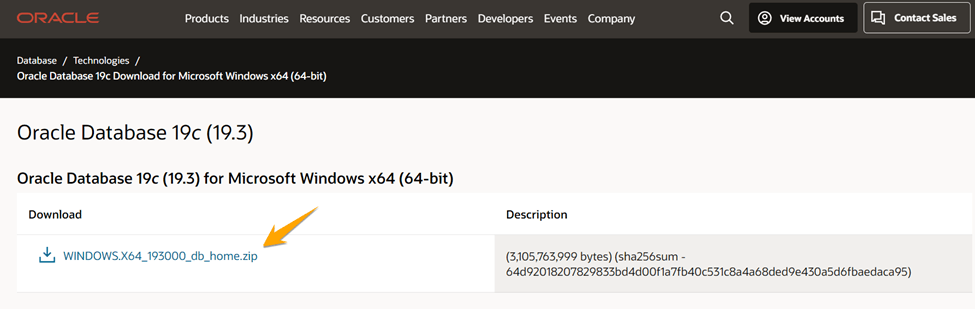
After downloading, open the installation and set the username and password for the database.

The installation has been completed successfully.

2. Installation of DbVisualizer and JDK 17
As a prerequisite, download JDK 17 from the Oracle platform for DbVisualizer. Make sure to install JDK after carefully choosing your OS version.

After downloading JDK, install and verify it using the following command in CLI.
                    $
                    java --version

Now go to the following link and download DbVisualizer.

After downloading, open the installation and install DbVisualizer. Select whether you want to associate .sql file types with DbVisualizer making them open in the tool here:
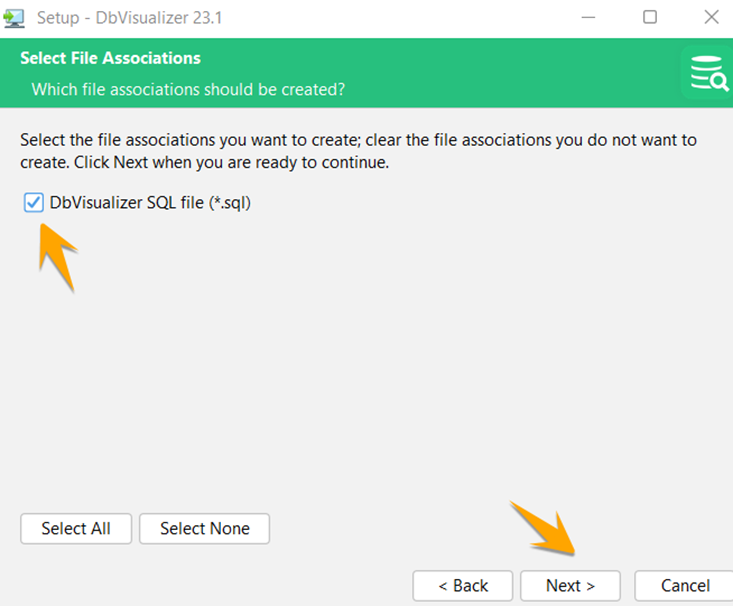
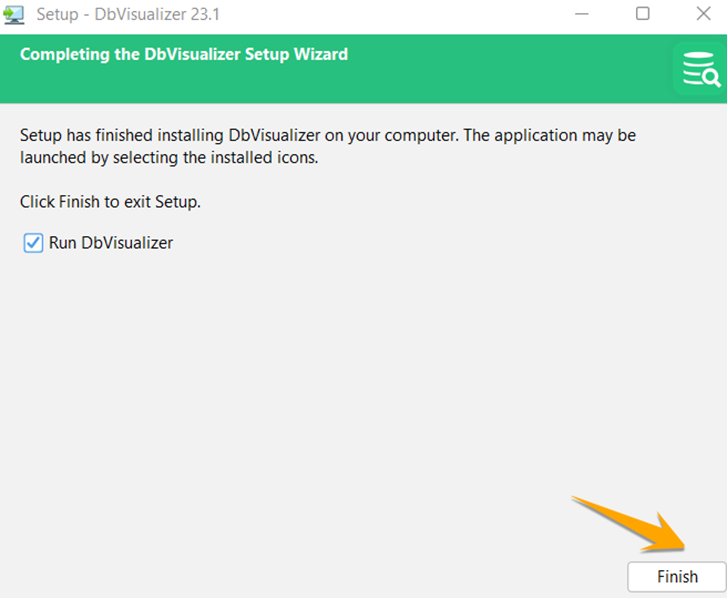
Click Next, and you will see that DbVisualizer has been successfully installed.
3. Creating a Connection with Oracle through DbVisualizer
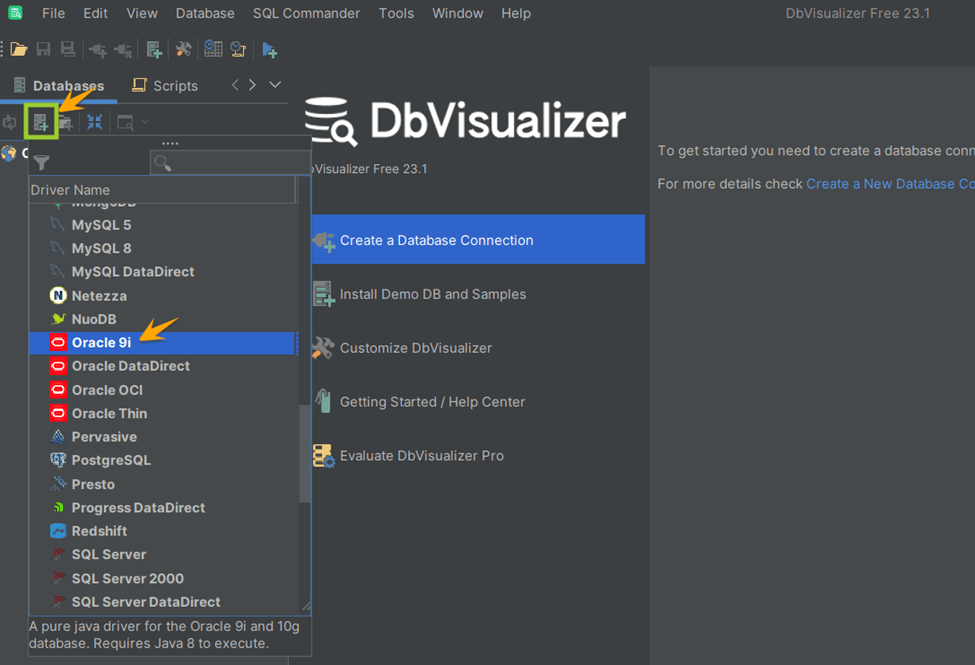
Now we will create a new connection with the Oracle database using DbVisualizer. Click on the highlighted plus icon and select the “Oracle 9i” option.
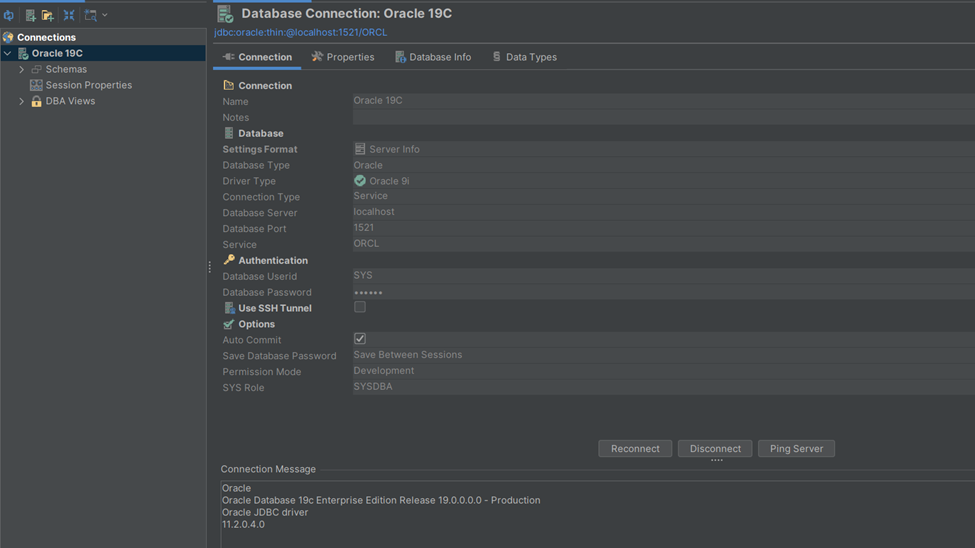
Now enter the username as “SYS” and Oracle DB password, choose the SYS Role as “SYSDBA,” and then click on the “Connect” button.

Now the connection has been established.
4. Get Pluggable Database and Set Container
To experience the behavior of database links in Oracle, we have to do some prerequisites, so get the name of our pluggable database by the following query.
                    1
                    SELECT PDB_NAME FROM DBA_PDBS;

ORCLPDB is the name of our pluggable database. Use it according to your settings by using the above query. Now use the alter session command and set the container with a pluggable database name.
                    1
                    ALTER SESSION SET CONTAINER = ORCLPDB;

Pluggable database has been set.
5. Create Users and Grant Access in the Current Container
Here, we will create 2 users that will display the behavior of 2 databases by which we can visualize the database link usage.
1
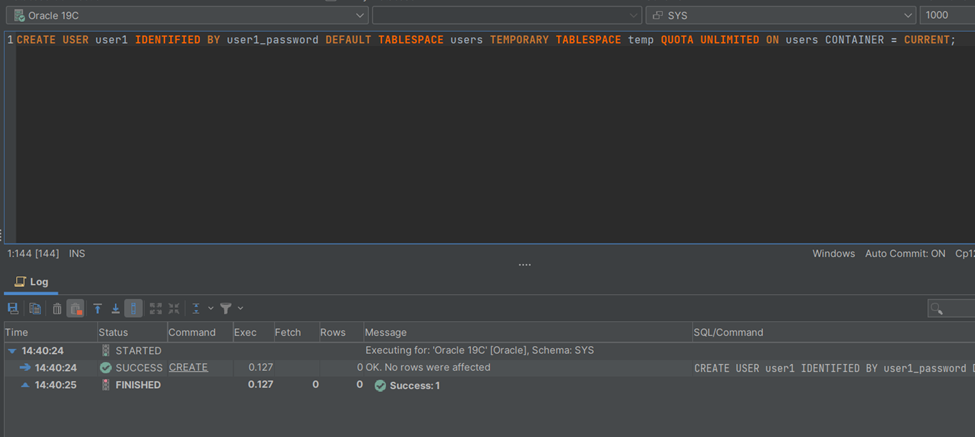
CREATE USER user1 IDENTIFIED BY user1_password DEFAULT TABLESPACE users TEMPORARY TABLESPACE temp QUOTA UNLIMITED ON users CONTAINER = CURRENT;
Now grant necessary privileges to “user 1”.
                    1
                    GRANT CONNECT, RESOURCE, DBA TO user1;

                    1
                    CREATE USER user2 IDENTIFIED BY user2_password DEFAULT TABLESPACE users TEMPORARY TABLESPACE temp QUOTA UNLIMITED ON users CONTAINER = CURRENT;

Now grant necessary privileges to “user 2”.
                    1
                    GRANT CONNECT, RESOURCE, DBA TO user2;

Great! You’ve now created users and granted some of the privileges to these users. Now it’s time to create a database link.
6. Oracle Create Database Link
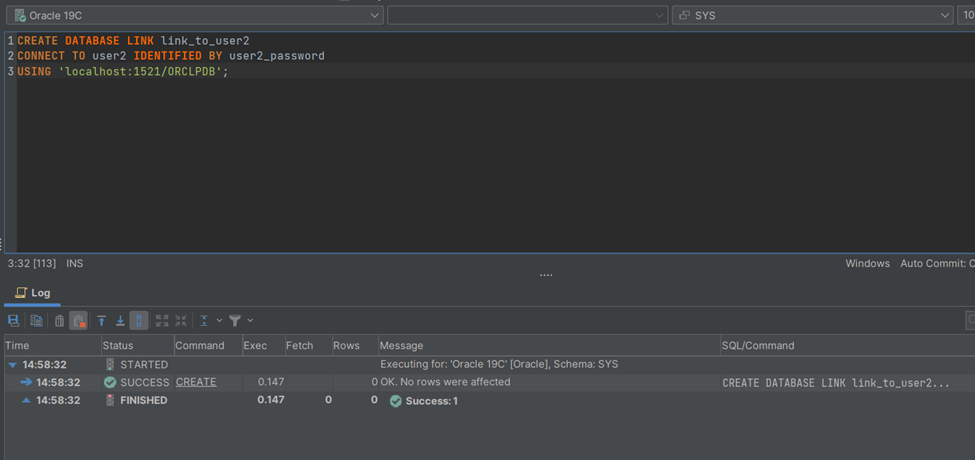
Now connect to “user 1” using DbVisualizer, and create a database link to “user 2”.
                    1
                    CREATE DATABASE LINK link_to_user2


                    2
                    CONNECT TO user2 IDENTIFIED BY user2_password


                    3
                    USING 'localhost:1521/ORCLPDB';
7. Create Database Tables and Insert Data
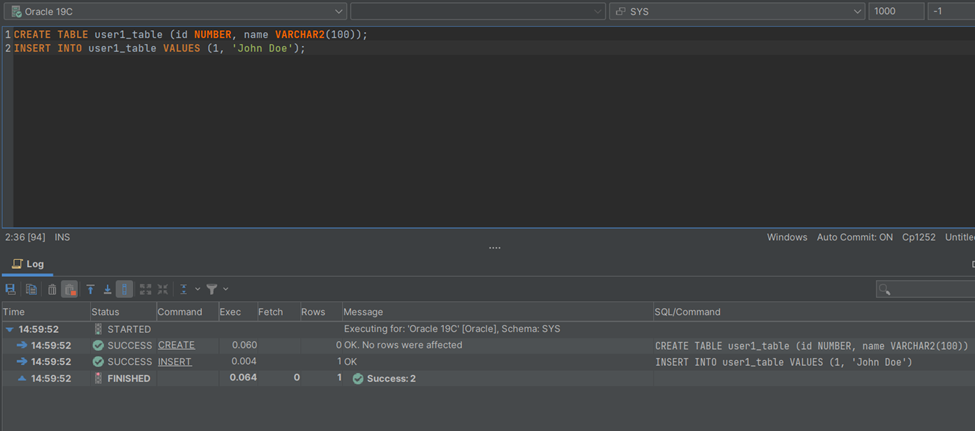
Create a table that will be associated with the first user (user1) and add one data row to it.
                    1
                    CREATE TABLE user1_table (id NUMBER, name VARCHAR2(100));


                    2
                    INSERT INTO user1_table VALUES (1, 'John Doe');
Now create a table that will be associated with the second user (user2) and add one data row to it.
                    1
                    CREATE TABLE user2_table (id NUMBER, name VARCHAR2(100));


                    2
                    INSERT INTO user2_table VALUES (1, 'Jane Smith');

8. Test the Oracle Database Link
After integrating and setting the Oracle database link, run the following query to test everything.
                    1
                    SELECT * FROM user2_table@link_to_user2;

Finally the user has access to the data from another database using the database link functionality.
Conclusion
In this article, we delved into the process of creating a database link in Oracle using DbVisualizer. We emphasized the significance of database links for centralizing data management and enabling information sharing between different systems and departments.
The steps involved in the process, prerequisites, and tips for troubleshooting common issues were also discussed. By using DbVisualizer, the process of creating a database link in Oracle becomes simpler and more efficient because of its abilities to run queries, simplify your workflow, and having specific features each of them designed to solve real-world problems. With a clear understanding of the steps involved and the troubleshooting tips provided, you can successfully create a database link in Oracle and take advantage of its benefits.
Visit our TheTable blog and stay tuned to learn more about the database world, and until next time.