Knowing Structured Query Language, or SQL, is foundational for various data professions, including data analysts, data engineers, and data scientists. In many organizations data is stored in relational databases and SQL is the standard language that is used to query and pull data from relational databases. However, I have encountered a number of individuals who are not sure how to learn SQL because they have not been exposed to a relational database. Fortunately, there is a relatively straightforward way to create and manage your own relational database that I will illustrate in this article. Let’s see how it can be done.
Tools Needed
SQLite
First, we will need a SQL engine, which is a piece of software that interprets and executes SQL commands. There are numerous engines to choose from, but for educational purposes, I prefer using SQLite, which is a widely-used free and open-source SQL engine. An added benefit of SQLite is that databases can be stored locally as files on your computer (these files have a “.db” extension). SQLite can be downloaded here.
DbVisualizer
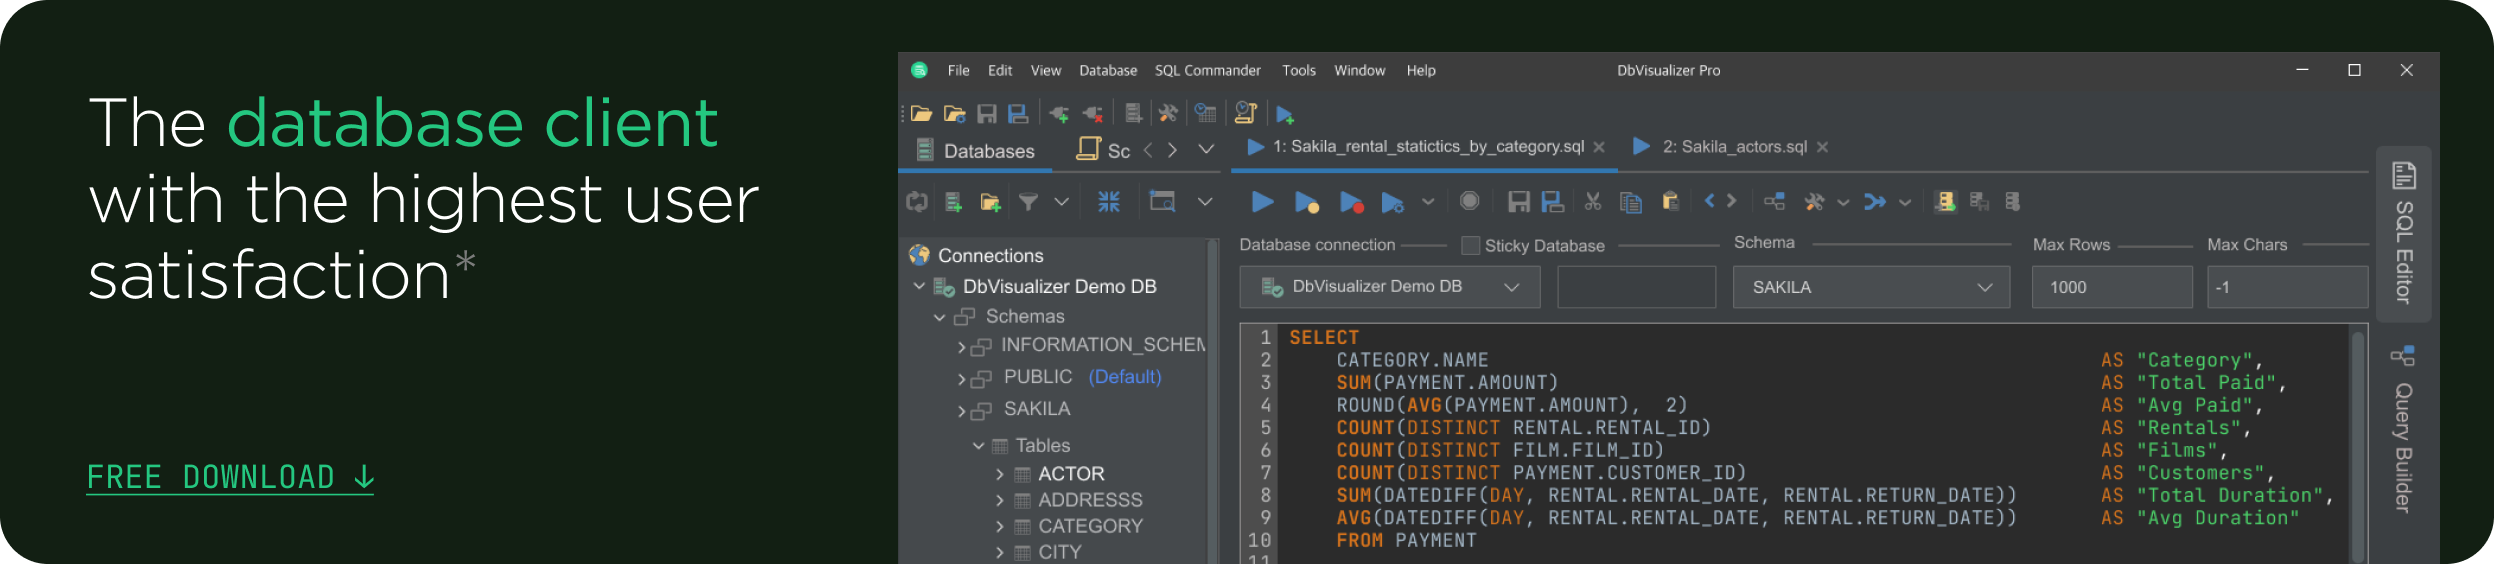
DbVisualizer is a popular tool for connecting to multiple SQL engines and databases, including SQLite. Aside from its ability to easily connect to a SQLite database file, as well as other SQL engines, DbVisualizer is also used here because it contains a visually appealing and easy-to-use query editor with syntax highlighting. Download DbVisualizer here.
Creating an Empty SQLite Database
Once SQLite is installed on your machine, open a new SQLite session. On Mac or Linux a new SQLite session can be initiated by navigating to a terminal (e.g., Terminal on MacOS) and running sqlite3. Windows users can run the sqlite3.exe executable file, which will open a new shell running SQLite.
With the SQLite session running, the next step is to create an empty database file named “school.db.” This can be accomplished by writing .save school.db in the SQLite session as shown below.

Note, that if you want to save your database file to a specific location, include the full path after .save For example, if I wanted to save to a folder named sqlite_databases located in my home directory I would have written.save /Users/scottadams/sqlite_databases/school.db. Next, hit the Return/Enter key to execute the .save command. Now exit SQLite by writing .exit and clicking Return/Enter on your keyboard. There should now be a file named school.db in your home directory, or another desired directory if specified.
Connecting to the Database
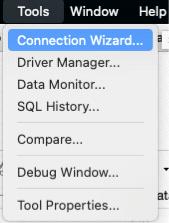
Now we need to establish a connection to the school.db file in DbVisualizer. So open DbVisualizer, navigate to “Tools,” and click on “Connection Wizard”… as shown below.
Write “school” (without quotes) in the blank box in the middle of the New Connection Wizard window and click on the “Next” button.

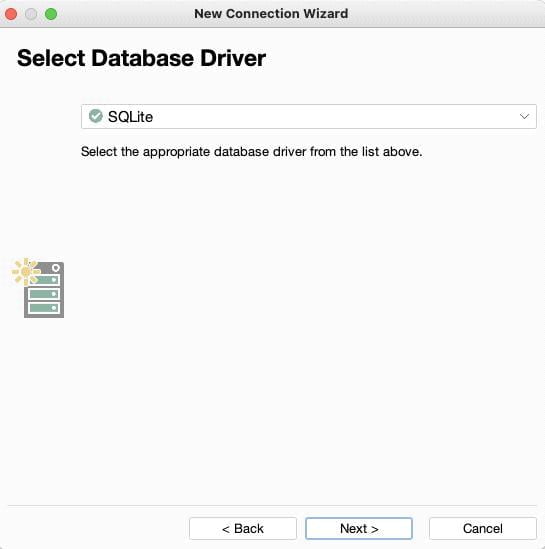
Now find the SQLite driver in the dropdown menu that appears in the next window. Then click on Next.
In the following window navigate to the “Database file name” row under the “Database” section. Click on the down arrow button to the right of mysqlite.db (if you do not see this button double click in the text box containing mysqlite.db), locate the school.db on your machine and select the school.db file.

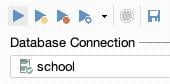
Now click on the “Finish” button. You should return to the main DbVisualizer screen and should see a new connection named school in the tree on the left, similar to the screenshot shown below.

Additional help on set-up on other topics can be found on DbVisualizer’s support page.
Keep in mind that this database is empty. So now we need to create some tables.
Populating the Database with Tables
Navigate to “SQL Commander” and select “New SQL Commander” to open a new editor.

You should see an empty editor like that shown below.

Click on the down arrow to the right of the “[Choose Connection]” message and select the school connection.

Inspired by this sample database, let’s create a database that provides data on students enrolled at a hypothetical college. We will have four tables in total: students, departments, subjects, and marks. We can create a table in SQLite using the general pattern below.
                    1
                    CREATE TABLE table_name (


                    2
                    column_1_name TYPE COLUMN_CONSTRAINT,


                    3
                    column_2_name TYPE COLUMN_CONSTRAINT,


                    4
                    ... column_n_name TYPE COLUMN_CONSTRAINT,


                    5
                    TABLE_CONSTRAINTS )
CREATE TABLE is SQL command that creates a table; pretty self-explanatory. table_name and column_#_name are user-provided table and column names, respectively. TYPE is the specification of an individual column’s data type, such as INTEGER or TEXT. The SQLite website provides more detailed information on available data types. Constraints are specific rules applying to individual columns ( COLUMN_CONSTRAINTS ) or tables themselves (TABLE_CONSTRAINTS ). For example, if a column cannot have NULL (i.e., missing) values then the NOT NULL column constraint would be used. If you are interested in learning more about constraints available in CREATE TABLE read this article.
Let’s now create the students table, using the following code.
This table contains four columns: student_id (individual student identifier, e.g., 001, 002, 345), student_name (student’s first and last name), department_id (the department of the discipline in which the student is majoring, e.g., 055, 006, 043) and date_of_birth (student’s date of birth, YYYY-MM-DD). date_of_birth is a DATE data type, while the other three columns are text data types (any columns with an “_id” suffix are treated as TEXT data types to allow leading zeros). The NOT NULL at the ends of lines 2,3, and 5 indicate that student_id, student_name, and date_of_birth columns cannot have NULL values. In other words, if a record is to be added to the students table, the record cannot have missing data for the student’s identifier, name, and birthdate. However, department_id can have NULL values because a student may not have a declared major.
If you are looking for an easy and powerful SQL client and database manager, then you've got to try DbVisualizer. It connects to nearly any database.
Line 6, PRIMARY KEY(student_id) , identifies the column that serves as the primary key in the table. The primary key is the column whose values uniquely identify each record. Line 7 establishes that department_id is a foreign key, which is a column that serves as a primary key in another table. Following FOREIGN KEY(department_id) is the syntax REFERENCES departments(department_id) identifying the table ( departments ) and primary key ( department_id ) to which the foreign key refers. Specifying primary and foreign key constraints is useful because it provides instructions on how tables can be joined together.
The creation of the remaining tables follows the same basic pattern as the creation of the students table. The full code to create all four tables is shown below.
Once the code to create all four tables is in the editor click on the blue “play” button above “Database Connection” to execute the SQL code.
At the bottom of the screen in the “Log” window, you should see output that resembles the following.
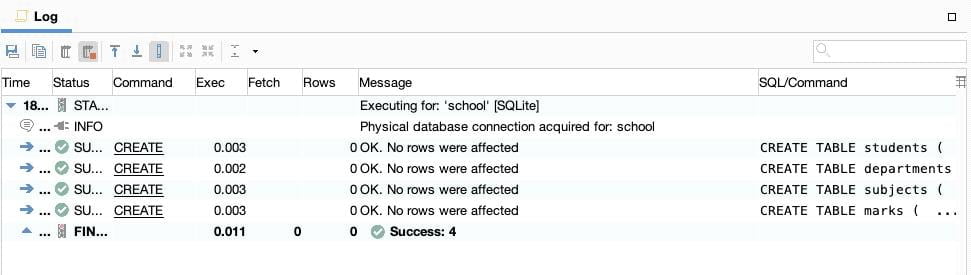
Congratulations, you just created four new tables! However, these tables only have columns, no rows. Thus, we need to add some actual records to the tables.
Adding Records to a Table
Using INSERT INTO
One or more records can be added to a table directly with the INSERT INTO SQL syntax. For brevity, let’s insert data into only one table here. For example, say we want to add records for two hypothetical students, Jane Student and John Student (no relation, also, totally hypothetical), to the students table. This can be accomplished with the following code.
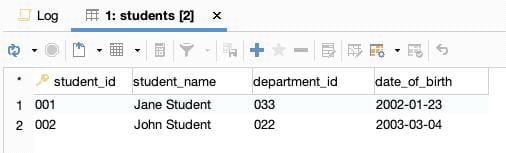
INSERT INTO students (student_id, student_name, department_id, date_of_birth) establishes that new data is going to be added to the students table in the four columns in parentheses. Each set of parentheses following VALUES provides the column values for the columns specified in line 1 for an individual row. After executing the INSERT INTO code above, run SELECT * FROM students;. The output below will appear at the bottom of the DbVisualizer window.
Using a Spreadsheet
What if the data that needs to be added to the table is already stored in an Excel spreadsheet

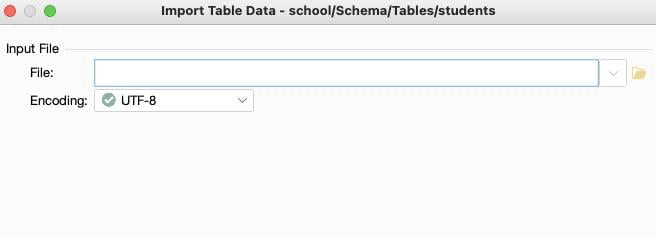
In this situation, we can import the data from the spreadsheet directly into the desired table. Note, however, that this feature is only available with the pro version of DbVisualizer. If you are running a free evaluation trial of the pro version of DbVisualizer, or have purchased a license, navigate to the tree view on the left and under “Connections,” expand “school,” then expand “Schema,” expand “Tables,” and right-click on “students.” Next, click on “Import Table Data…”

Locate the spreadsheet file containing the desired data and then click “Next” at the bottom of the window.
Select the desired sheet and click “Next.”

Now preview the data to be imported.
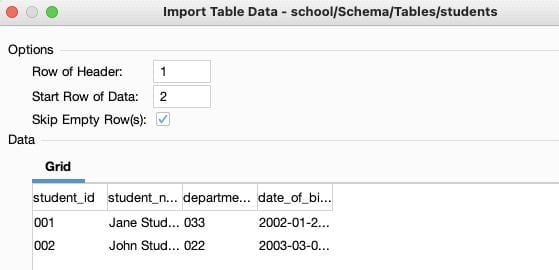
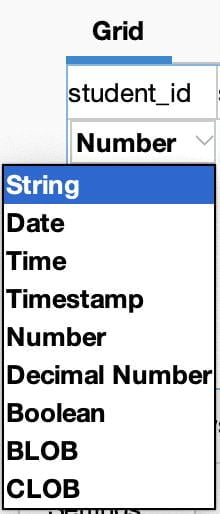
Next, check that date formats look correct. Be sure that the student_id and department_id columns are String types to ensure that these columns are treated as text, preserving the leading zeroes.

To change the data type of a column click on the data type directly below the column name in the “Grid” window and select the desired data type from the drop-down menu.
Perform one additional check that the columns and data types are appropriately specified in the next window.

If you are satisfied with the columns being imported, click on the “Import” button in the next window.

Now run SELECT * FROM students to see the imported data.
Conclusion
Now you know how to obtain valuable experience creating and manipulating databases on a personal computer with SQLite and DbVisualizer. What I like about the approach detailed in this article is that it provides a foundation for tinkering with relational databases, which is a great way to learn more about creating and using databases. So, go ahead, explore and see what you can do. If you make a mistake, try to fix it, and in the worst-case scenario just create a new database file.

