Welcome to this guide on how to work with MariaDB using DbVisualizer! This MariaDB guide will act as a quick start guide to one of the most popular relational databases you will find yourself working with using the tool.
You will need a server with access to MariaDB and basic knowledge of DbVisualizer!
Quick Start
To begin with, to start working with MariaDB using DbVisualizer, you’re going to need:
To begin working with MariaDB using DbVisualizer, ensure that MariaDB is running.
For Linux or macOS users, verify that with:
                    1
                    systemctl mariadb status
If you see “Active: active (running),” it means your local MariaDB server is running.
Windows and macOS users will have ensure that the MariaDB server is running by using one of the many available OS-specific options.
Next up, you’re going to need a free or a Pro license of DbVisualizer. For the Pro version, downloading and installing DbVisualizer as an evaluation trial should do the trick. Otherwise, just download the tool for free. If you’re already a user, you can skip this step.
After you’ve installed DbVisualizer, open the tool, then turn your eyes to the left side of the tool and open the ”+” dropdown below the “Databases” tab. Then, select the “Create Database Connection…” option:
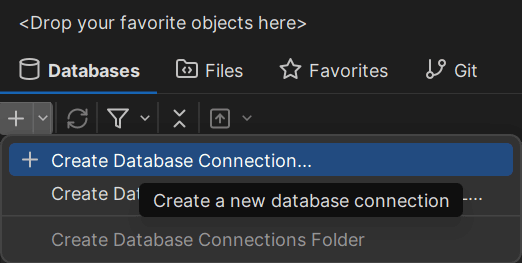
Then, find MariaDB in the list, connect to your database, and you should be good to go. For more guidance, refer to the following chapter.
Full Walkthrough: Step-By-Step Guide
After clicking the “Create a Database Connection…” option, find “MariaDB” in the database driver list. Click on it:
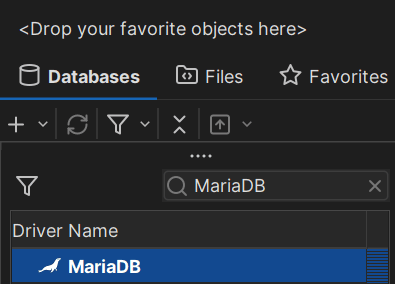
After you find the MariaDB driver, you will be asked to provide authentication credentials for your MariaDB server. Do that as follow:
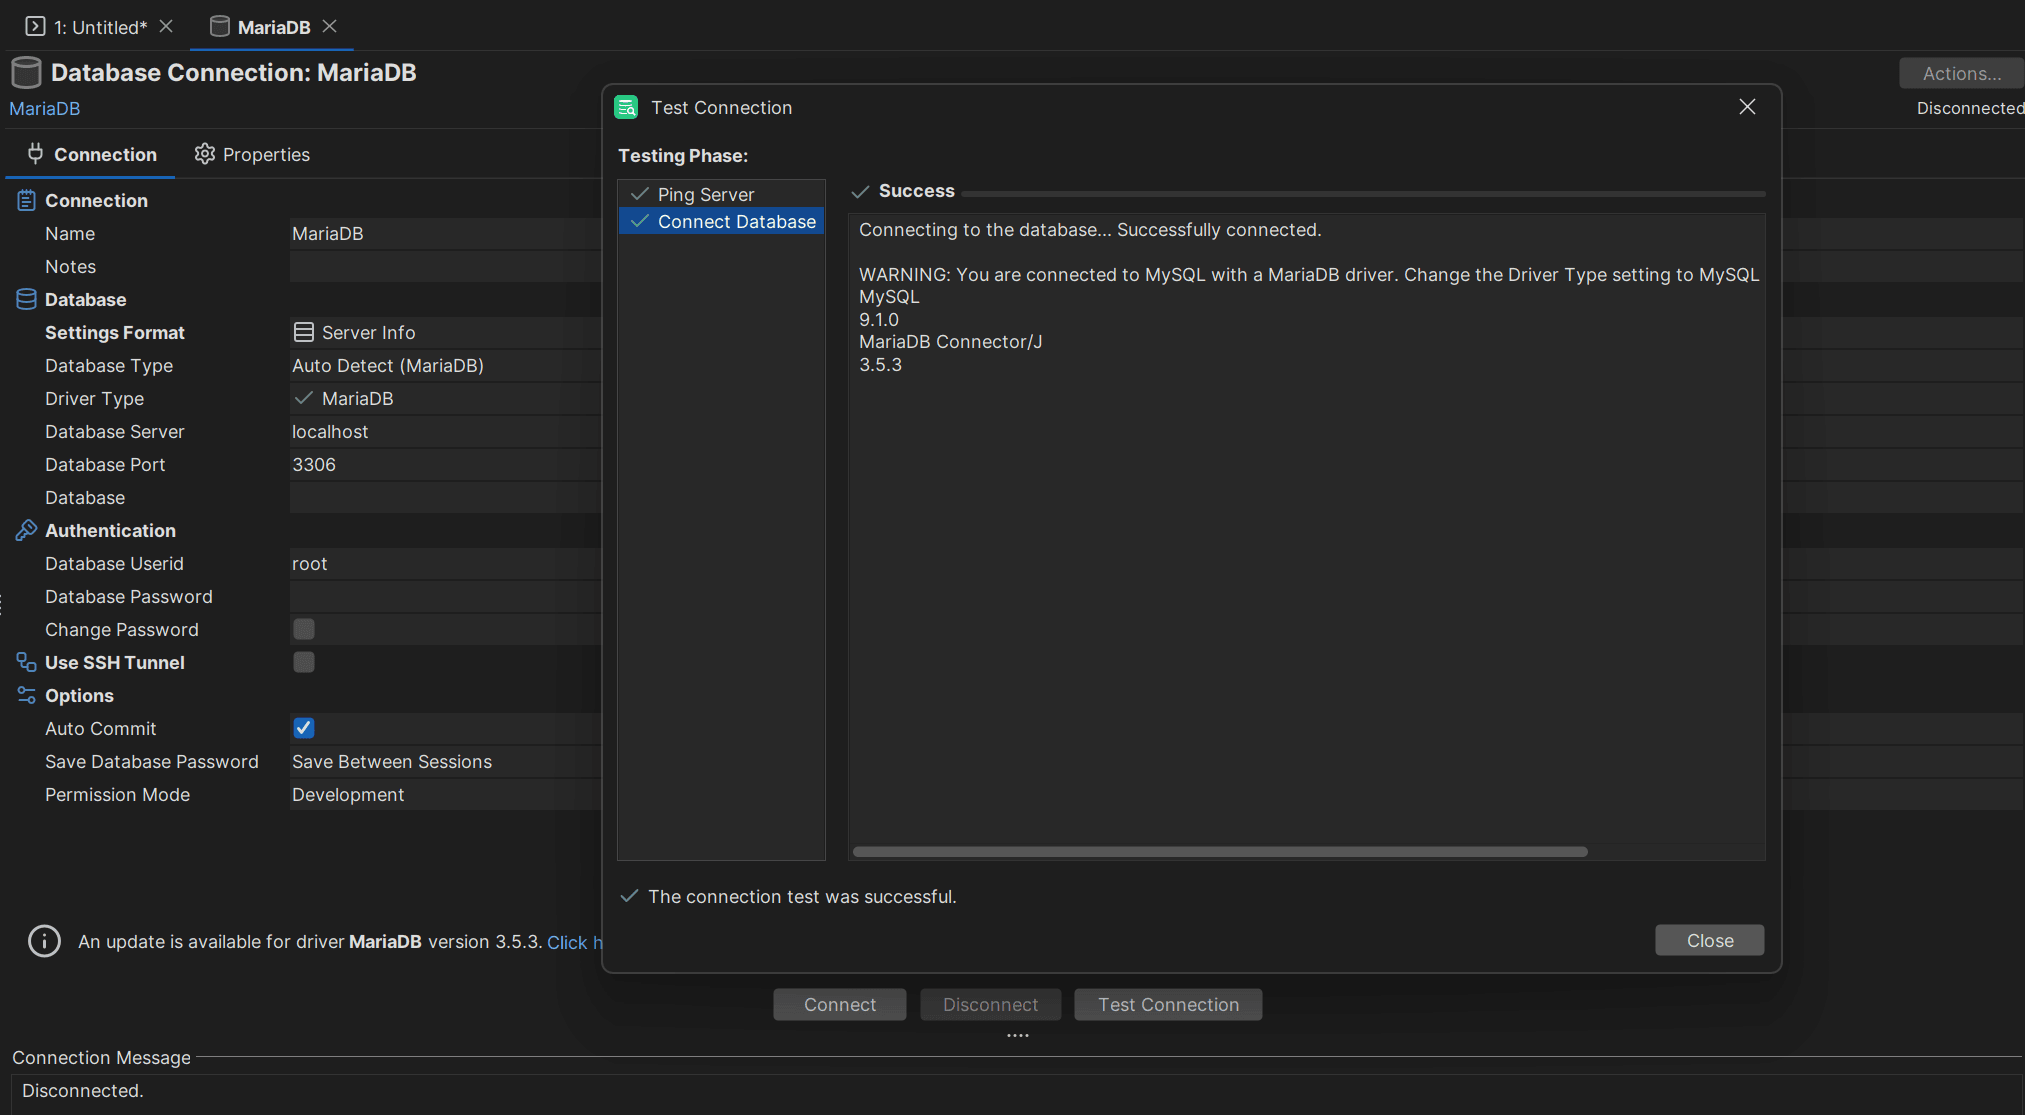
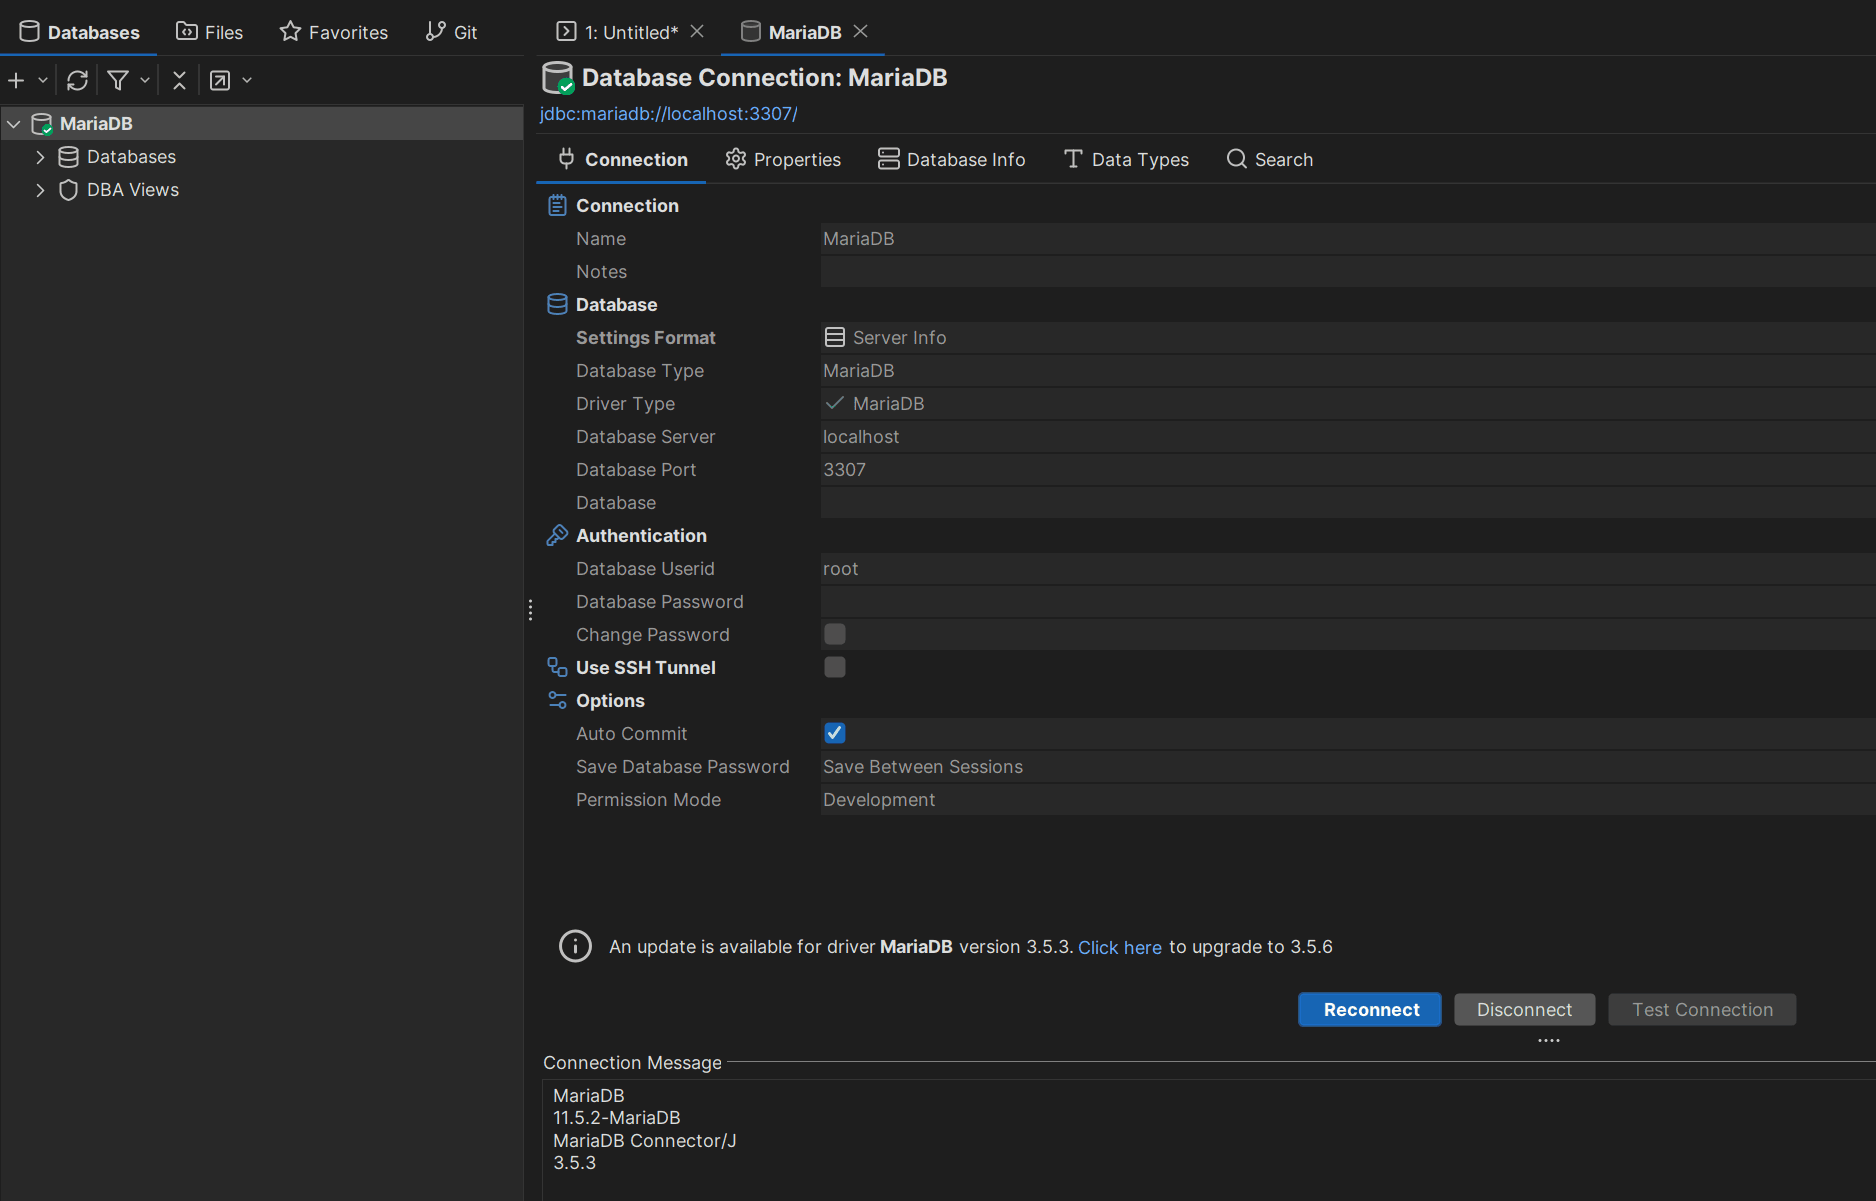
In this example, we’ve used MariaDB as the database with localhost as our database server. We’ve also used the default authentication method with the root username and no password in place.
Note: In your case, credentials will be different (you’re not using root without a password in production, are you?), so please replace credentials with your credentials.
Also, consider replacing the default port with 3307 (Remember: 3306 marks MySQL, while 3307 marks MariaDB.) If you don’t that, DbVisualizer will warn you:

You will still be able to connect as DbVisualizer will understand both 3306 and 3307. However, just in case you want to make sure you’re connecting to MariaDB and not MySQL, replace the port.
Once you’re done connecting, you will see a message under the connection settings and a green tick on the MariaDB instance on the left:
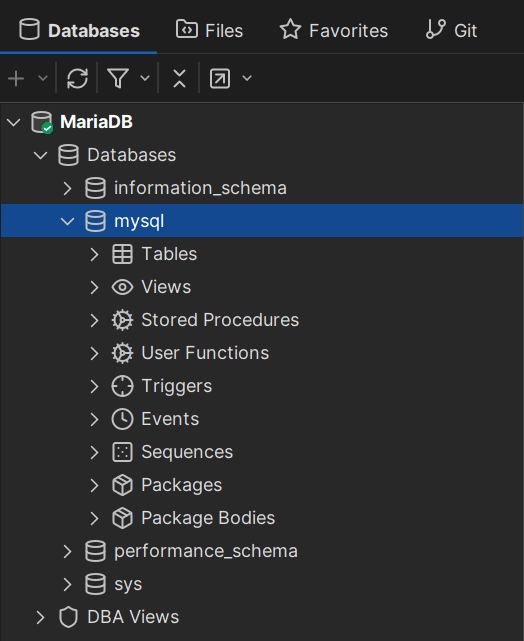
Now, you’re ready to work with MariaDB using DbVisualizer. Head over to the left side and expand available options. Your databases (and the tables within) should be there:
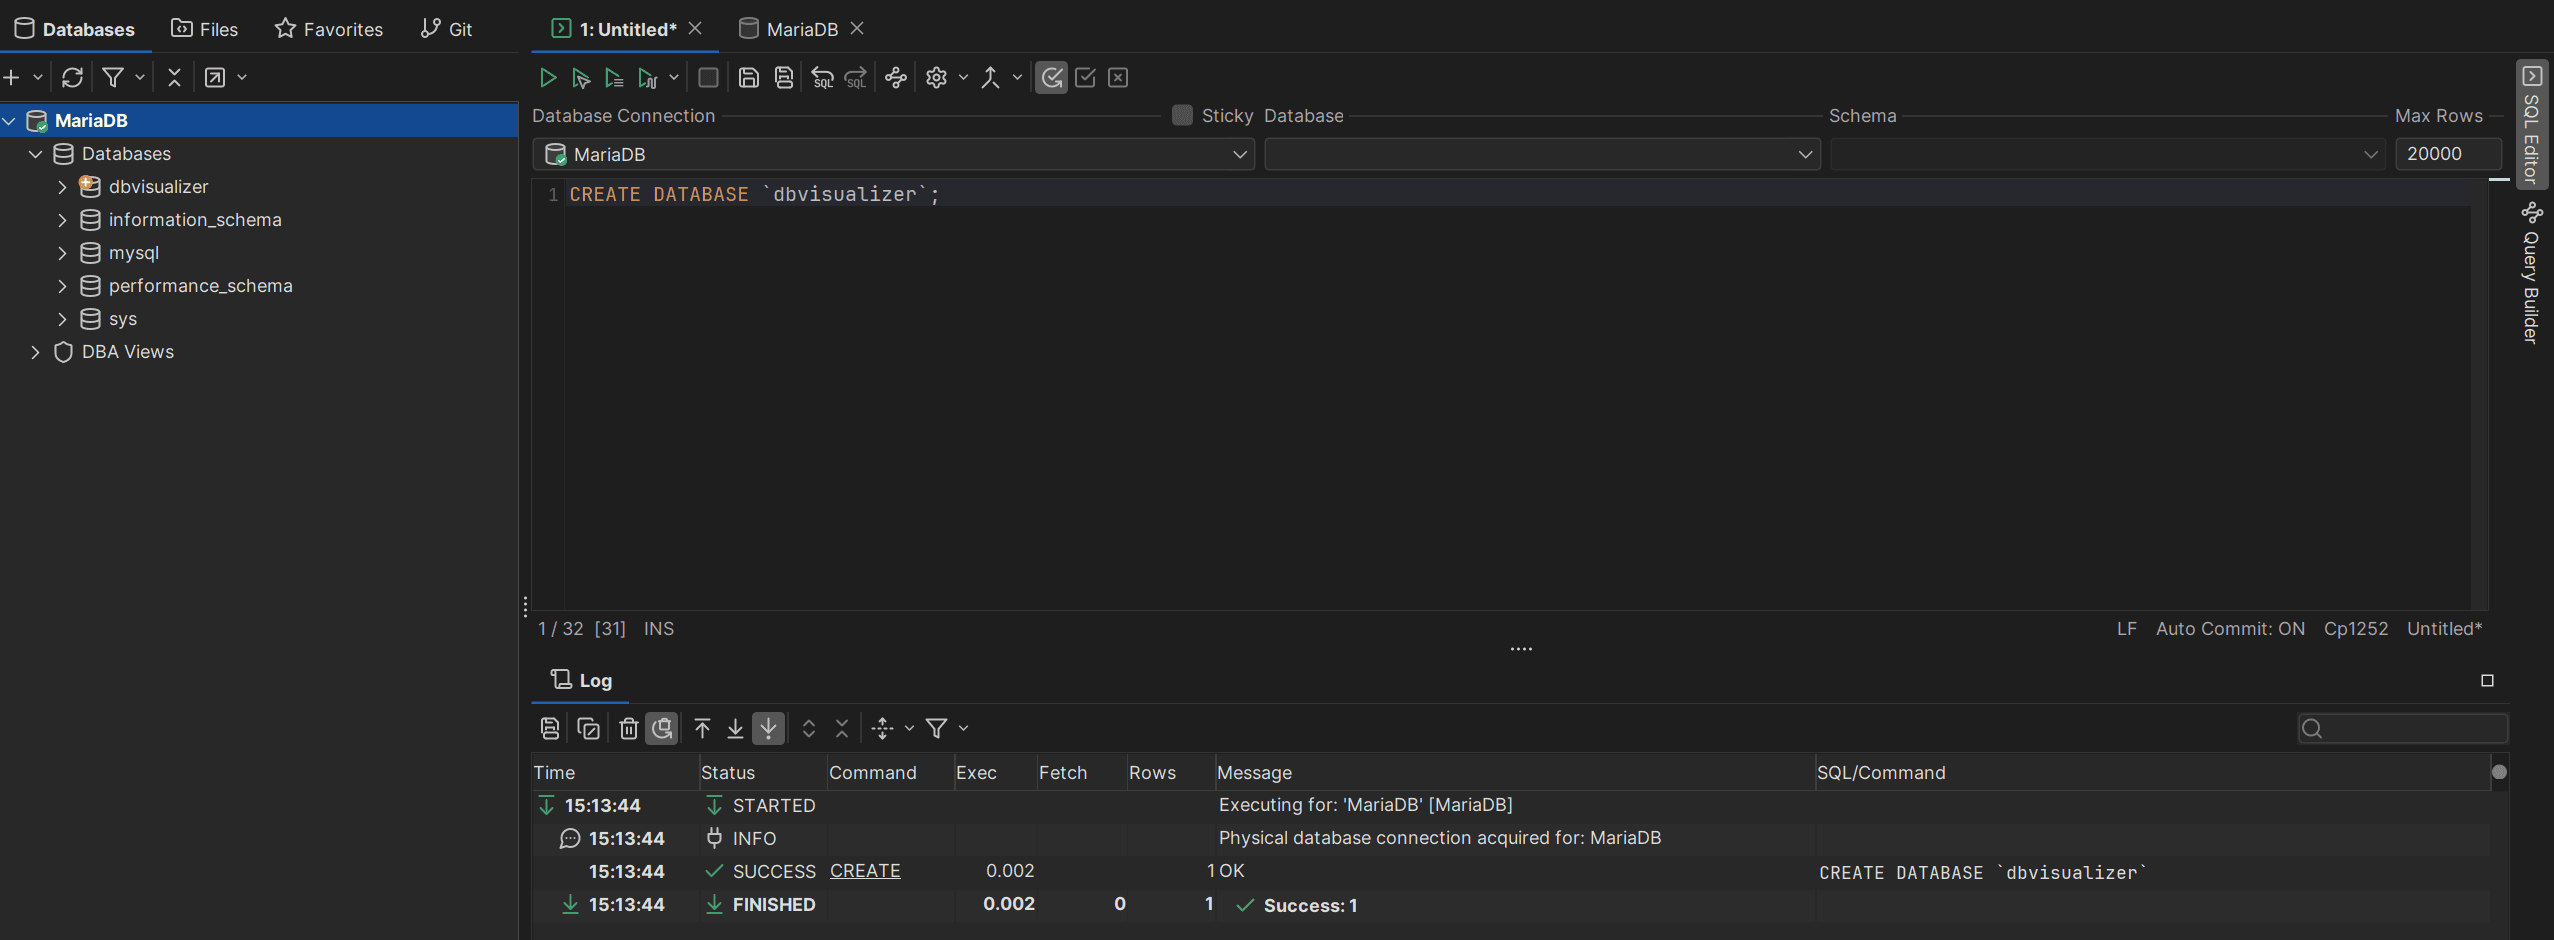
You’re also ready to dig into and query MariaDB using the SQL Editor feature from DbVisualizer:
Alternative Ways to Connect to MariaDB Using DbVisualizer
Providing a username and a password isn’t the only way to connect to and work with MariaDB using DbVisualizer. One of the alternative ways to connect to MariaDB using the tool would be to use SSH instead of a username and a password.
To do that, we need to create an SSH configuration when setting up a MariaDB database connection:
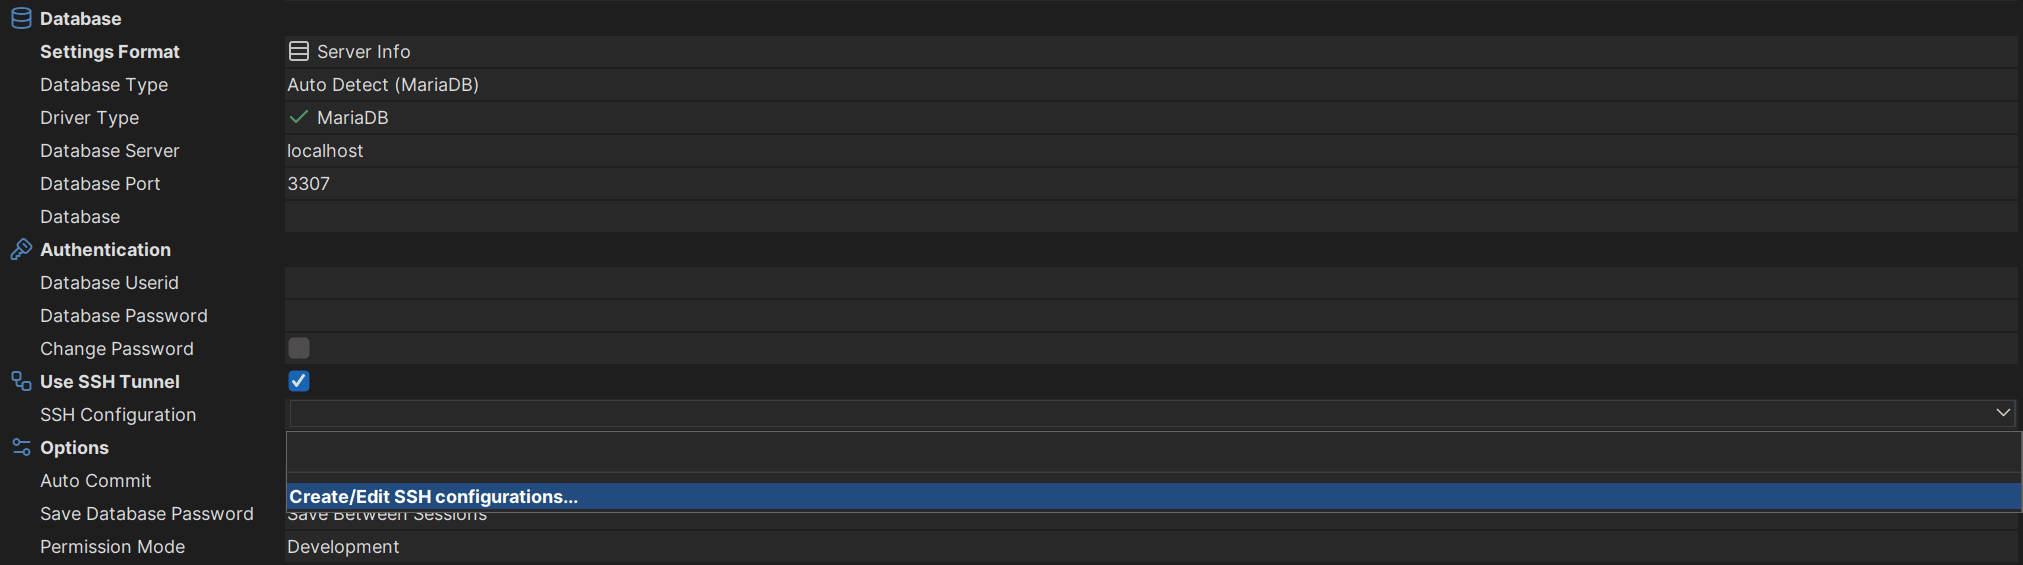
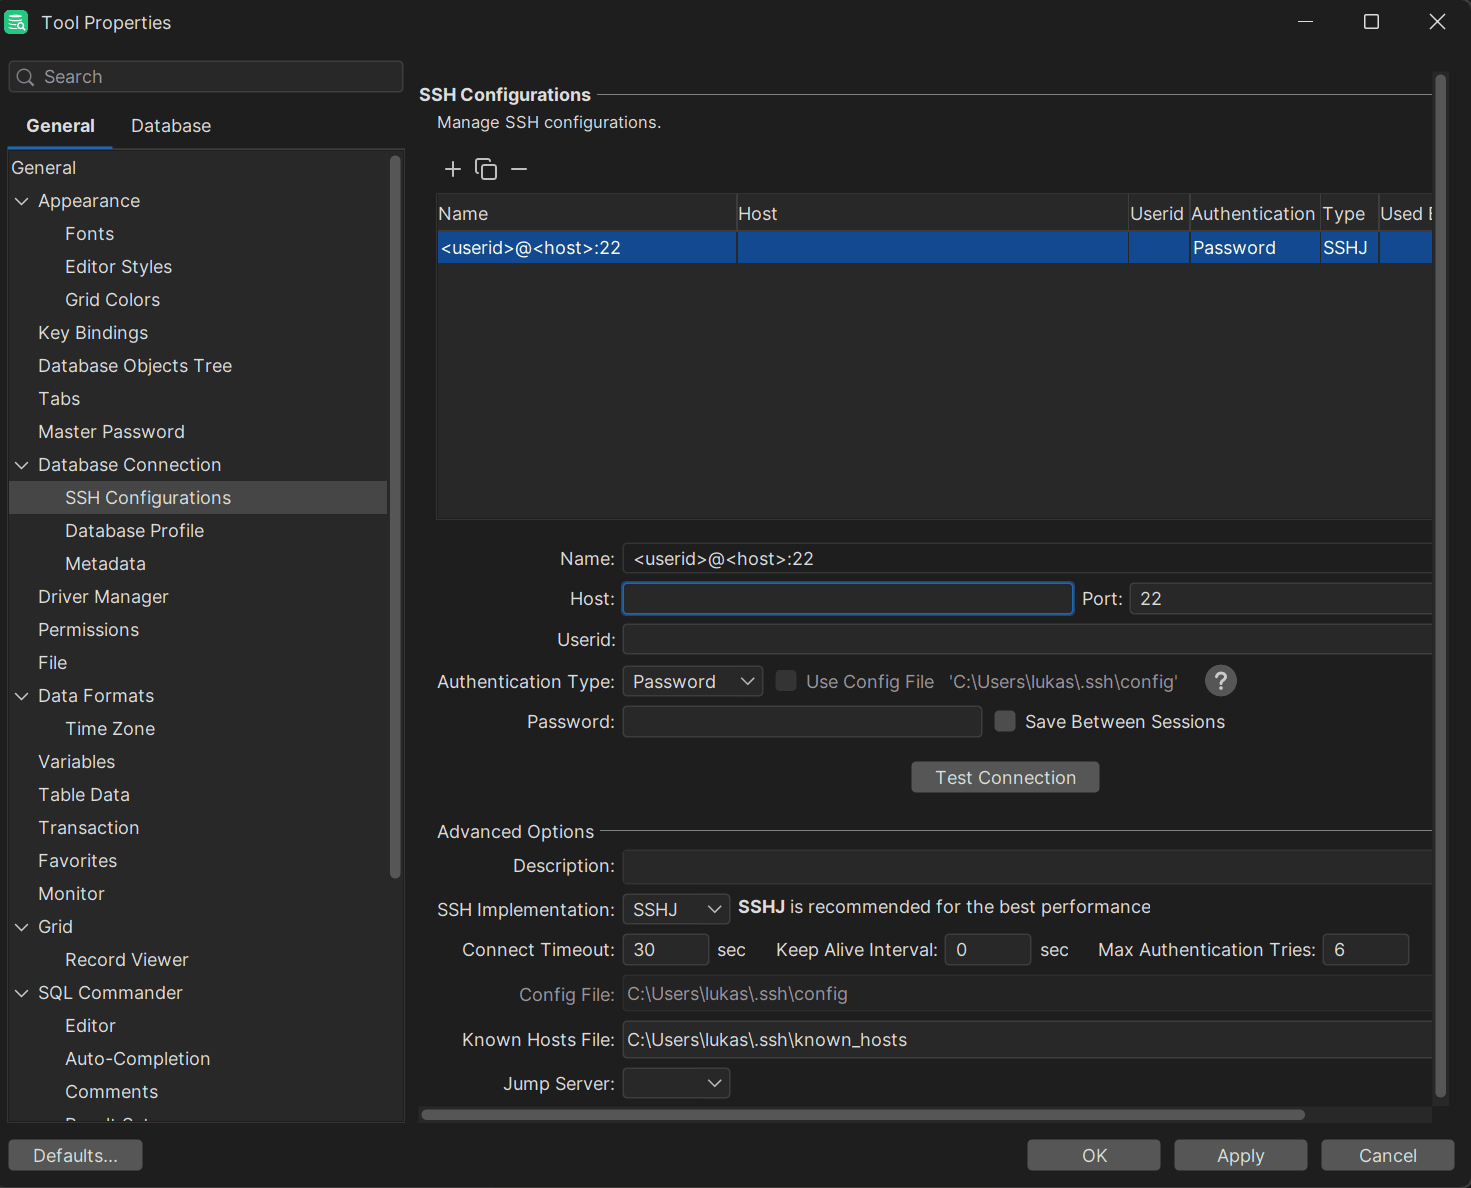
Once you chose to use SSH to connect to DbVisualizer, you will have to define an SSH host, a port, and the UserID you will use to connect to MariaDB.
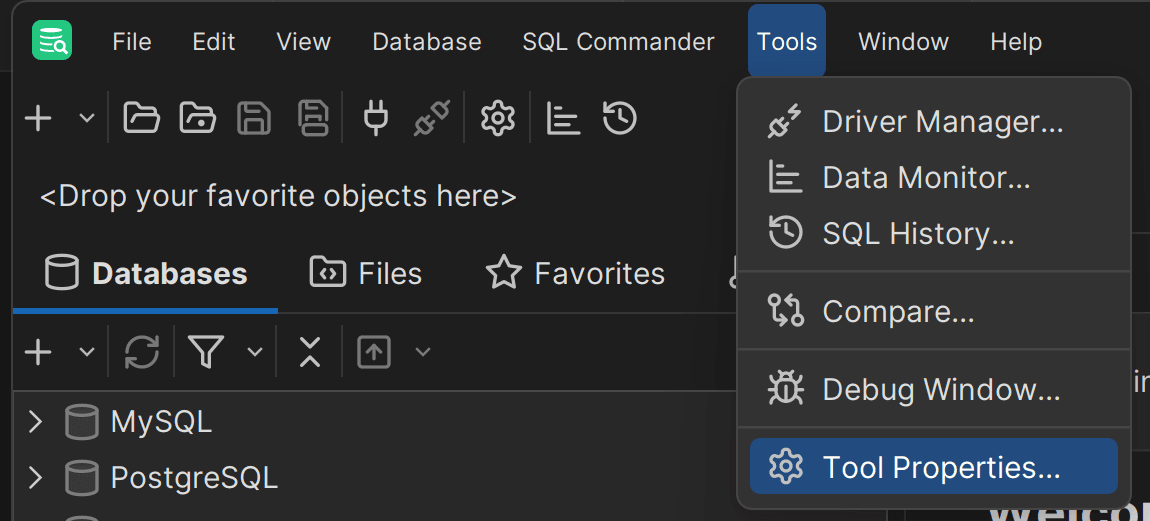
Notice that DbVisualizer provides you with the ability to change the authentication type for SSH. On To do this, select the “Tools > Tools Properties…” option from the top menu:
In the “Tool Properties” modal, select the “SSH Configurations” option. Here, you can choose from authentication via “Password” to authentication via other means (using a “Public Key” or an “SSH Agent”):
All the remaining aspects are the same as usual. Provide the details, connect to MariaDB, and you’re good to go!
Configuration Options
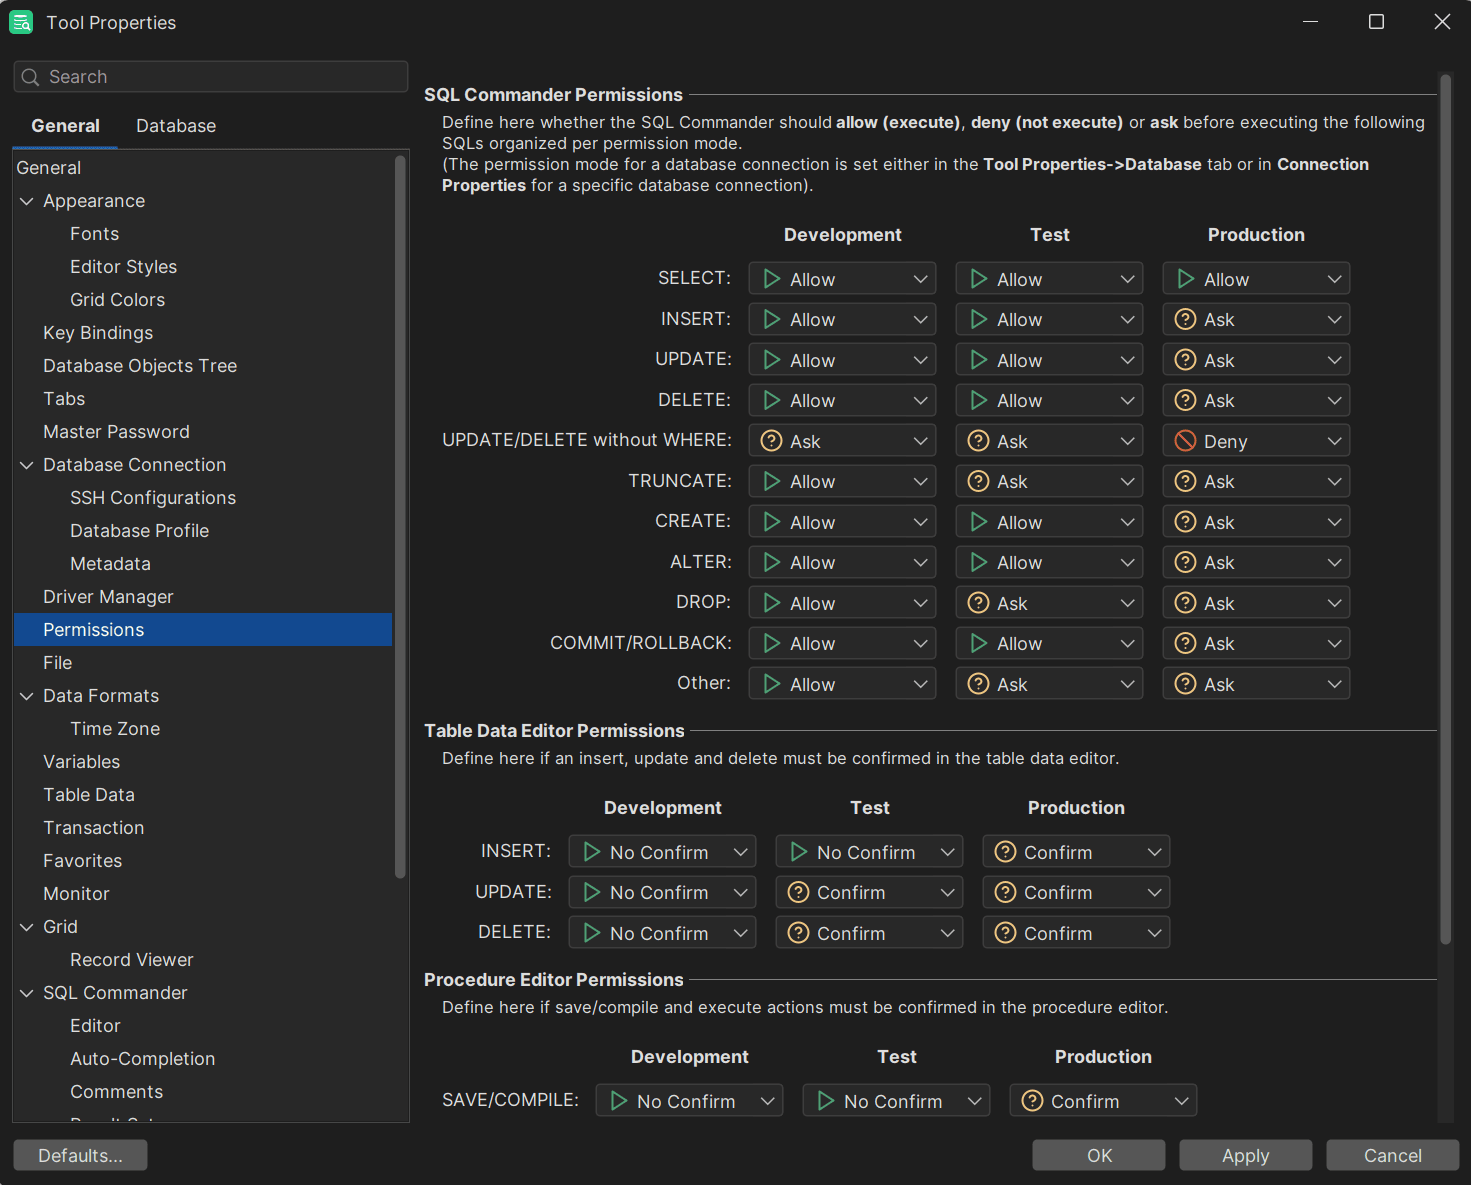
In the same “Tool Properties” modal, you will also see a “Permissions” tab on the left-hand side. If you click on it, you will be able to configure what happens once you run certain queries with that specific connection. There are 3 actions that can be taken and they are as follows:
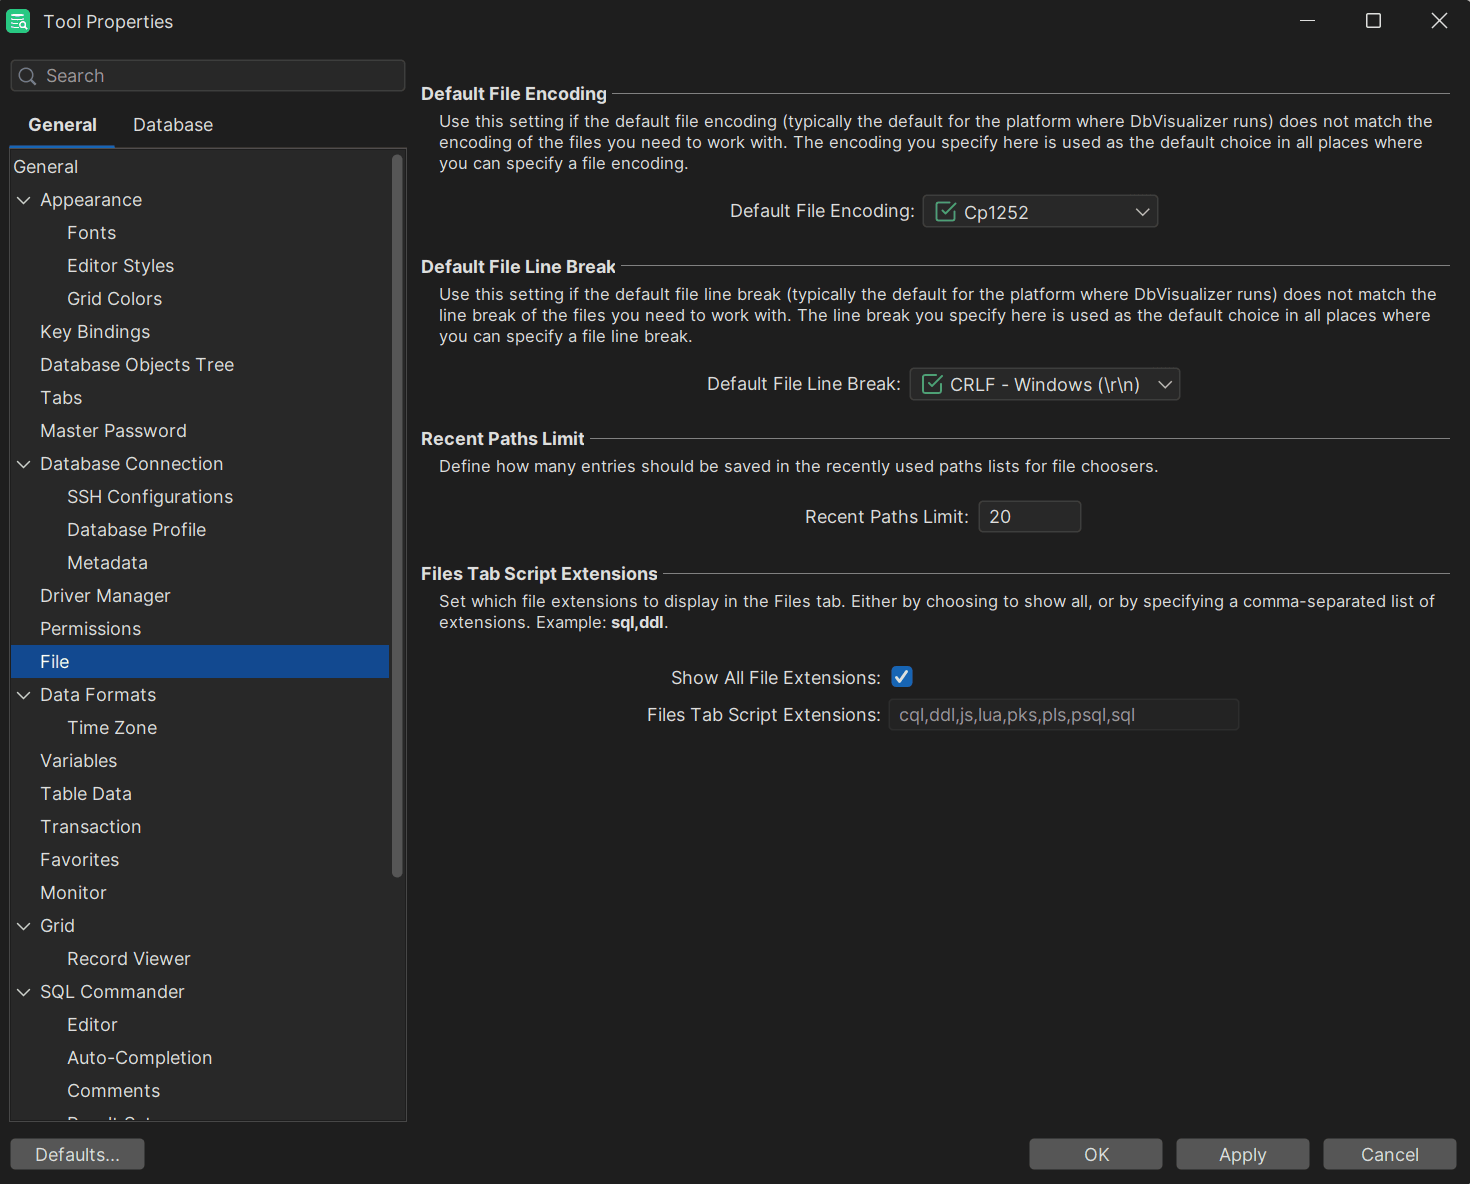
Aside from permissions, you can also set settings for files loaded in the database client, set the time zone format (see the “Data Formats > Time Zone” option), and more:
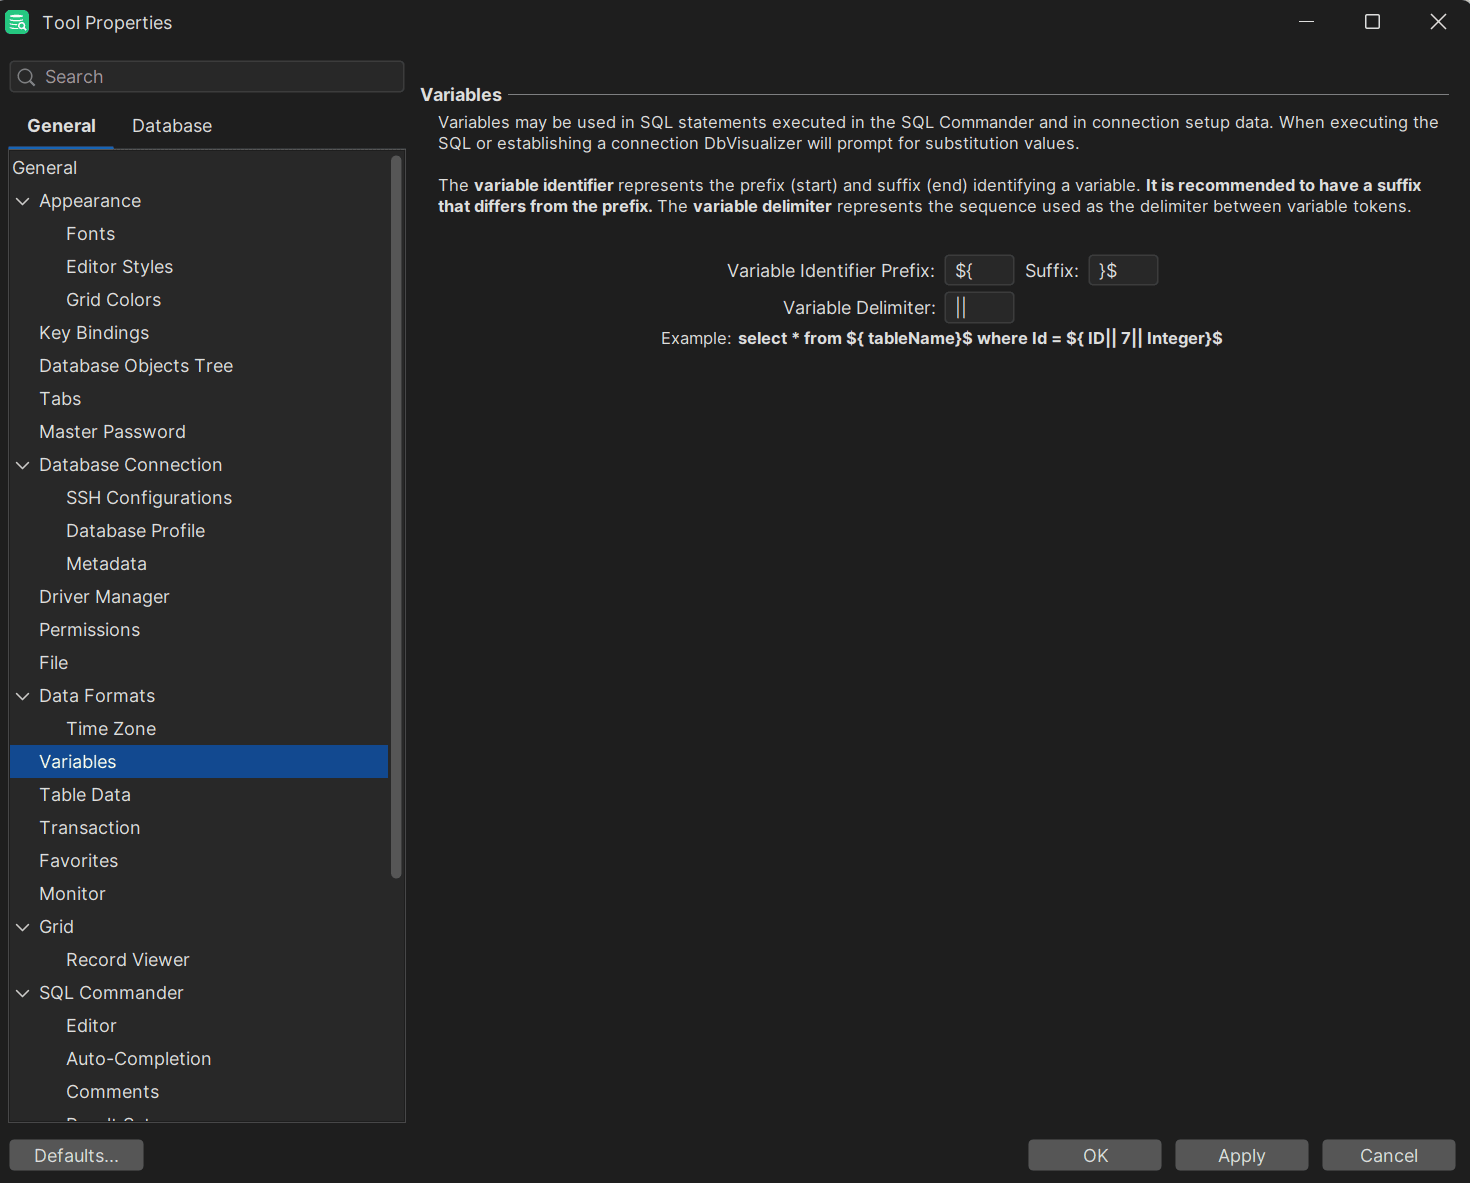
DbVisualizer also enables you to customize how the variables in the tool are used/presented:
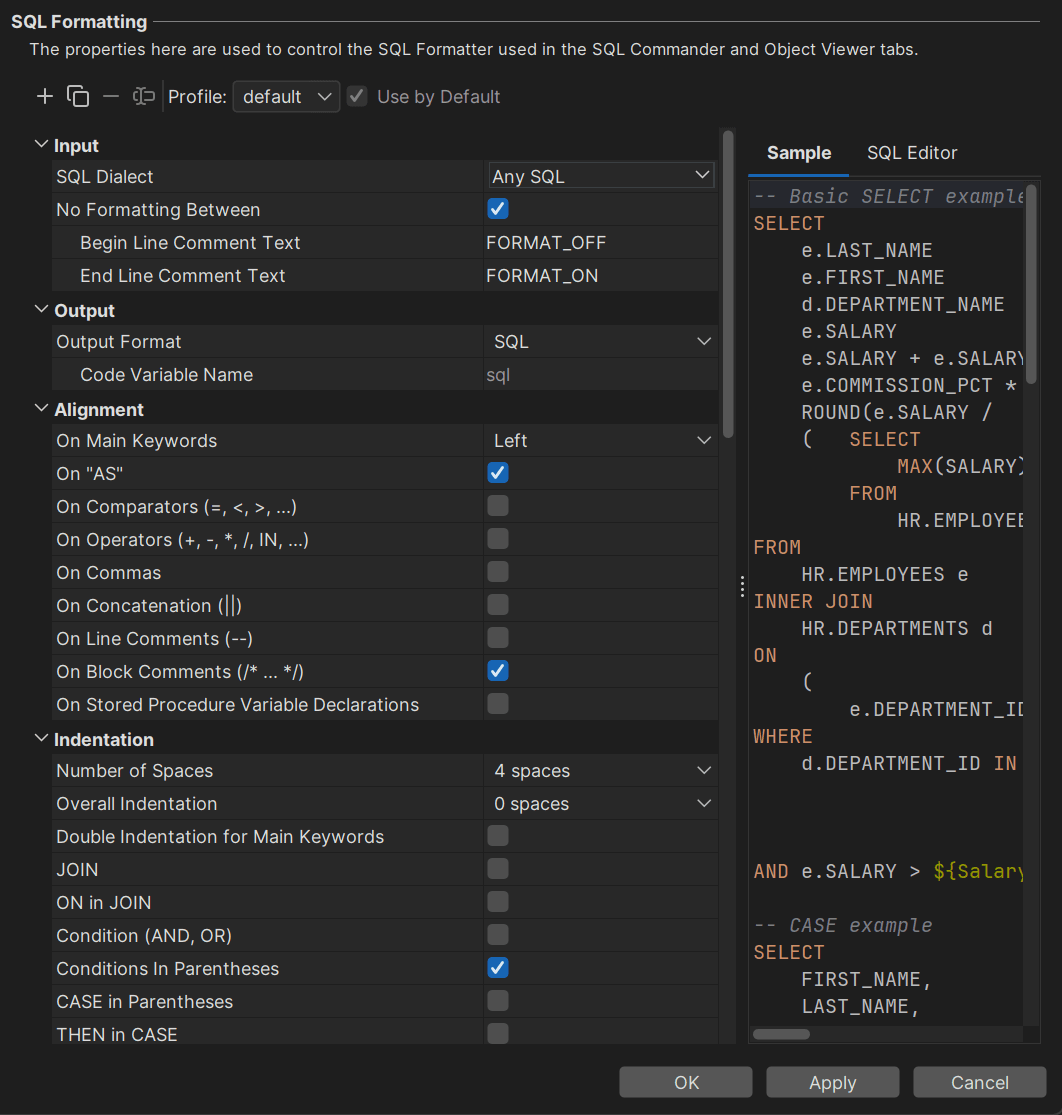
There are various other options, too. Some of these have do with the formatting of your SQL queries:
To see more of the available configuration options, turn to the left side of the “Tool Properties” menu.
Troubleshooting MariaDB Connection and Usage in DbVisualizer
The most common errors related to the usage of MariaDB in DbVisualizer include, but are not limited to the following:
| MariaDB Error | Solution |
|---|---|
| DbVisualizer responds with the following error: | |
Socket fail to connect to localhost:1242. Connection refused: getsockopt | Make sure that you’ve specified the correct port when trying to connect to MariaDB: 3307. |
| You’ve set up MariaDB within DbVisualizer but your authentication credentials have changed. | Right-click on the MariaDB connection in question on the left-hand side and click on “Edit Database Connection(s)…” option, then specify the right credentials. |
| Your MariaDB Server is not running: it’s impossible to connect to MariaDB using any SQL client. | Ensure your MariaDB Server is up and running. systemctl status mariadb will do. |
| The user you’re using is not privileged to insert/update/select data in MariaDB. | Ensure that the user you’re using to access MariaDB has all of the necessary privileges to perform necessary actions: |
SHOW GRANTS FOR 'username'@'host'; will do. | |
| SSL/TLS requirements are not met. | If SSL is required, make sure SSL certificates are configured in DbVisualizer. |
| JDBC Drivers | Ensure that DbVisualizer can download drivers by navigating to “Tools > Driver Manager” modal. |
| Review Error Messages | DbVisualizer will always display any error messages if the connection or queries have failed. Observe them and act accordingly. |
Appendix
Sample SQL Query to Create Tables in a Database
To create a table in MariaDB, you’ll need to make use of the CREATE TABLE SQL statement:
                    1
                    CREATE TABLE `table_name` (


                    2
                    `column` DATATYPE(length) [NULL DEFINITION|DEFAULT DEFINITION|PRIMARY KEY DEFINITION]


                    3
                    );
The idea here is to replace table_name with the name of the table that you want to create, column with the column name, DATATYPE(length) with the data type (VARCHAR, INT, TEXT, etc.) and the length with the length of the column (keep in mind that this feature is deprecated in newer releases of MySQL/MariaDB), and specify any definitions afterwards (whether the column is nullable, has a default value, etc. Alternatively, you can also rely on DbVisualizer's guided table creation interface.
JDBC URL Format for MariaDB
When it comes to the JDBC URL formats for MariaDB, they generally follow quite a standard pattern similar to that of JDBC URL’s used by MySQL. Here’s one of the most common occurrences (if the port is omitted, it defaults to 3306):
                    1
                    jdbc:mariadb://hostname:port/databaseName[?useSSL=true]
Key MariaDB File Locations
Overall, many of the key MariaDB file locations overlap by the key file locations offered by MySQL.
Glossary