Using the Query Builder
Only in DbVisualizer Pro
This feature is only available in the DbVisualizer Pro edition.
Using the Query Builder, you create a SELECT query by pointing and clicking instead of writing SQL. You add tables to a diagram, join them by dragging columns, and choose the columns, conditions and sorting in tabs. The Query Builder writes the SQL, which you then run in the SQL editor. Views work the same way as tables.
Opening the Query Builder
The Query Builder is part of SQL Commander. To show it, select SQL Commander → Show Query Builder, or click Show Query Builder at the right end of the SQL Commander toolbar. Check that the connection, database and schema at the top are the ones you want.
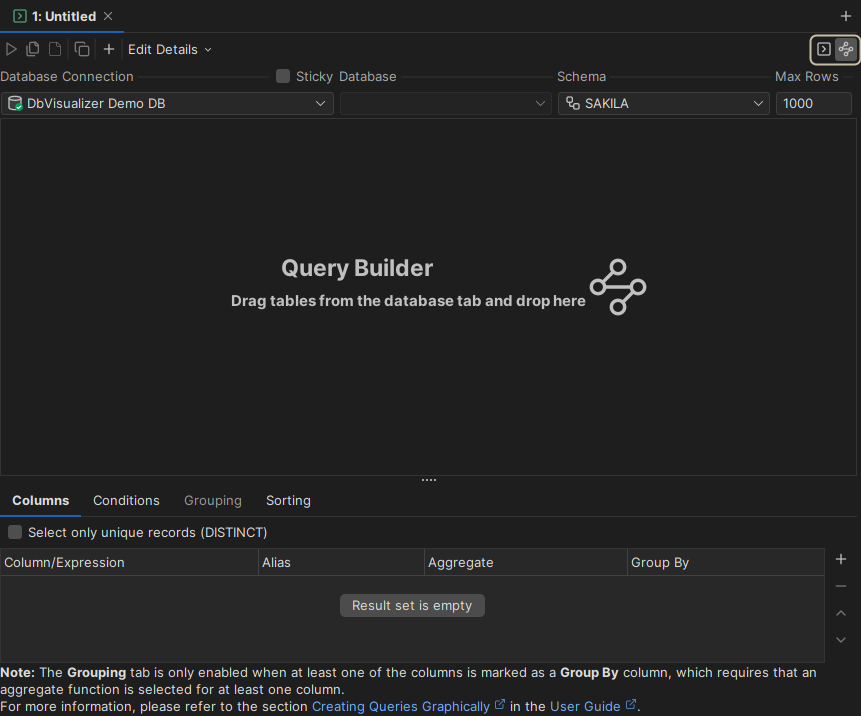
To switch between the Query Builder and the SQL editor, click Show SQL Editor and Show Query Builder in the toolbar. Switching doesn't copy the query. To copy it to the editor, use the toolbar at the top of the Query Builder:

The buttons, from left to right:
- Replace the text in the SQL editor with the query, and execute it.
- Replace the text in the SQL editor with the query, without executing it.
- Add the query at the end of the text in the SQL editor.
- Copy the query to the clipboard.
- Add tables by searching for them, see Adding tables.
- Choose what to show below the diagram: the query details or the SQL preview.
The first three buttons also switch to the SQL editor.
Adding tables
To add tables, drag their nodes from the Databases tab to the diagram. Each table is shown as a small window, with its name in the title bar.
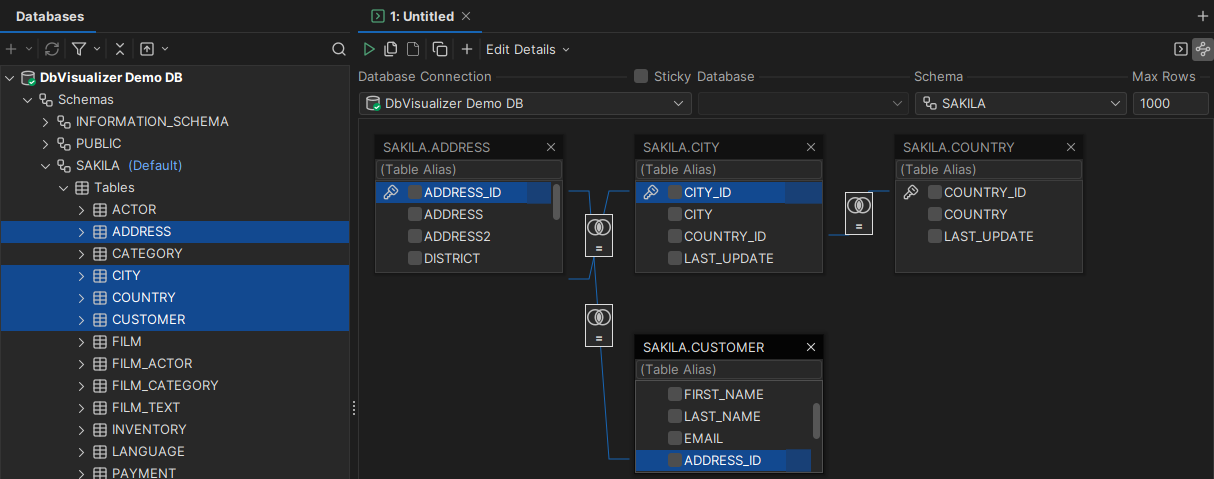
In a table window, you can:
- Enter an alias for the table, below the title. The alias is used in the query.
- Select the columns to include in the result, using the check boxes. The selected columns are also listed in the Columns and Sorting tabs.
- Move and resize the window.
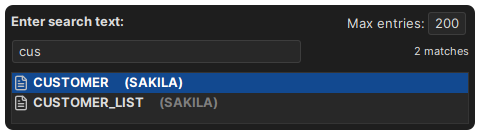
To find a table by name instead of dragging it, click the Quick Table Add button in the toolbar, and type the beginning of the name. To match text anywhere in the name, start with *.
Joining tables
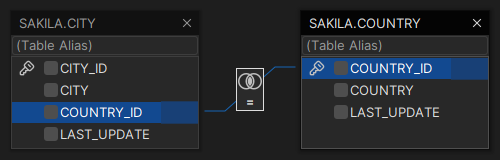
To join two tables, drag a column in one table window to a column in the other. The link between the columns is a join condition. To join on more columns, drag them in the same way. By default, the join is an inner join with the condition "equal to" (=), shown as an icon on the link.
Joining tables automatically
The Query Builder can join the tables that you add automatically, using the primary and foreign keys of the tables, or columns with the same names. For example, the CITY table has a COUNTRY_ID column, which refers to the column with the same name in the COUNTRY table.
Automatic joins are on by default, using the keys. To turn them off, or to match column names, use the Query Builder category in the properties for the database type (the Database tab in Tools → Tool Properties) or for a connection (the Properties tab of the connection's Object View tab).
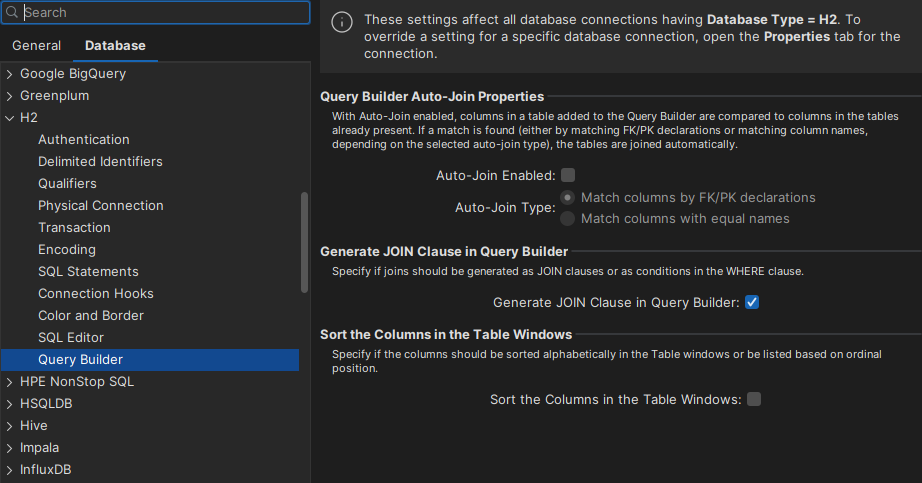
If a table has columns that refer to other columns in the same table, it is added twice and joined to itself. One of the windows gets an alias, so that you can tell them apart.
Changing the join type
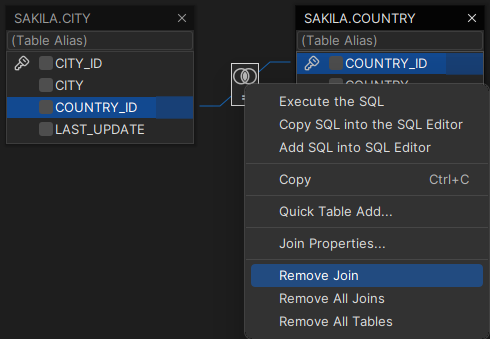
To change the join type or the condition, double-click the join icon, or right-click it and select Join Properties. The join types are:
| Join type | Result |
|---|---|
| Inner | The rows that match in both tables. This is the most common type. |
| Left | All rows of the left table, with NULL for the right table where there is no match. |
| Right | All rows of the right table, with NULL for the left table where there is no match. |
| Full | All rows of both tables. |
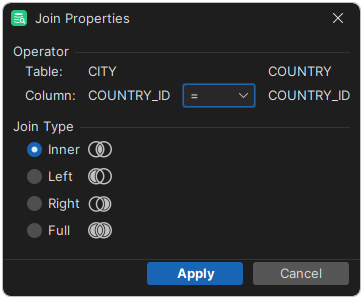
When two tables are joined on several columns, each condition can have its own operator, but the join type is the same for all of them. This is how SQL works.
For the join above, the Query Builder writes:
SELECT
    *
FROM
    SAKILA.CITY
INNER JOIN
    SAKILA.COUNTRY
ON
    (
        SAKILA.CITY.COUNTRY_ID = SAKILA.COUNTRY.COUNTRY_ID);
Removing tables and joins
To remove a table, click the close icon of its window. To remove a join, right-click the join icon and select Remove Join. To remove all of them, select Remove All Joins or Remove All Tables.
Choosing columns, conditions and sorting
The tabs below the diagram correspond to the parts of the query. The tables come from the diagram.
  SELECT <Columns>
    FROM <tables in the diagram>
   WHERE <Conditions>
GROUP BY <Columns>
  HAVING <Grouping>
ORDER BY <Sorting>
Columns
The Columns tab lists the columns that you have selected in the table windows, in the order you selected them. To change the order, use the up and down buttons. To select all columns of a table, right-click the column list in its window and select Select All. To remove a column, clear it in the table window.
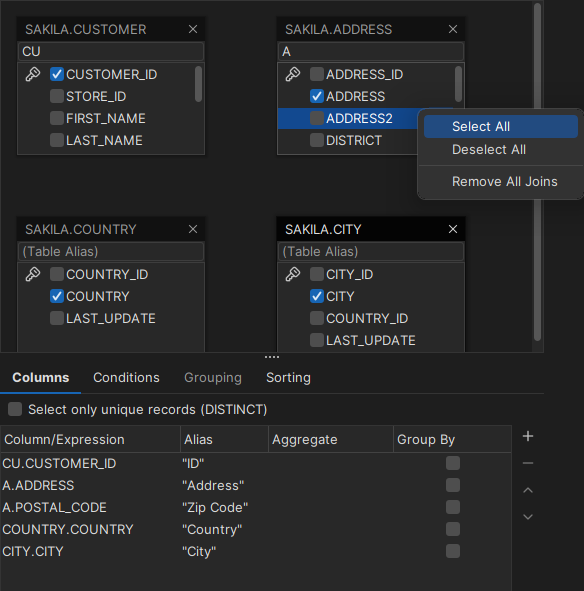
In the Alias field, you can enter a name for the column in the result. The Query Builder doesn't quote the alias, so check whether your database needs quotes.
To group the result, use Aggregate and Group By together. Select an aggregate function, such as COUNT or SUM, for some columns, and Group By for at least one of the others. Group By is only available when a column has an aggregate function, and a column can't have both.
Expressions
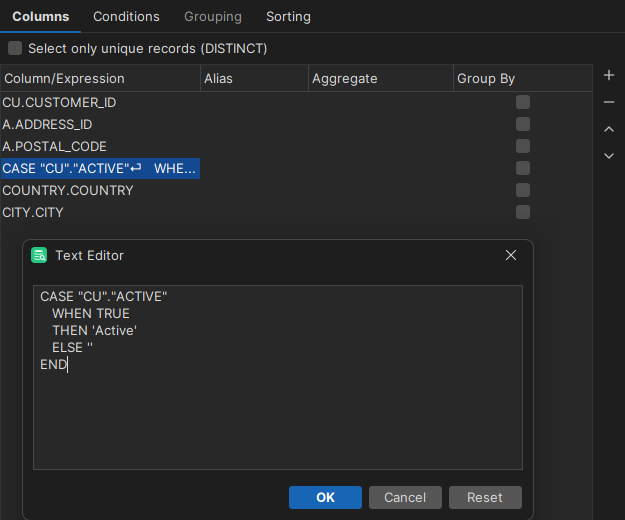
To add an expression, such as col1 + col2 or a function call, type it in the empty row at the end of the list, and click the plus button to get a new empty row. To remove an expression, select it and click the minus button. For a long expression, such as a CASE clause, double-click the cell and click the button on its right to open an editor.
Conditions
The Conditions tab holds the WHERE clause. Conditions are connected by AND or OR, and the indentation in the list decides the order in which they are evaluated: each level is put in brackets in the SQL.
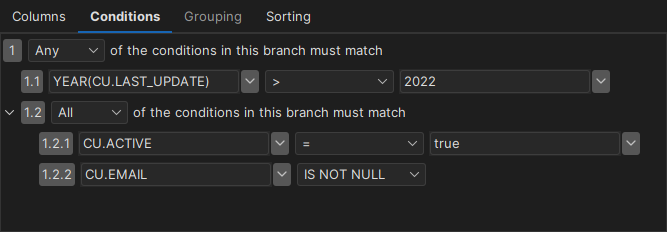
To add a condition, click the numbered button in the list, and choose to add a condition on the same level or a compound condition, or to delete the condition. For a compound condition, choose whether All (AND), Any (OR), None (NOT OR) or Not All (NOT AND) of its conditions must be met. The conditions in the picture above give:
WHERE
    YEAR("CU"."LAST_UPDATE") > 2019
OR  "CU".ACTIVE = TRUE
AND "CU".EMAIL IS NOT NULL;
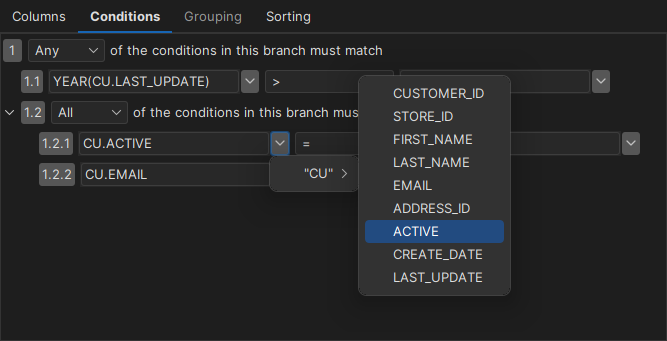
To choose a column instead of typing it, click the arrow next to the field. A field can also hold an expression, which you can edit in an editor, as in the Columns tab.
Grouping
The Grouping tab holds the HAVING clause, which filters the groups after the WHERE clause has filtered the rows. It is only available when a column in the Columns tab has Group By selected. It works like the Conditions tab, but the arrow next to a field only lists the columns of the result, since a HAVING clause can only refer to them.
Sorting
The Sorting tab sets the order of the result. It lists all columns of the tables in the diagram and the expressions in the Columns tab.
Previewing and running the query
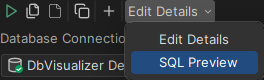
To see the SQL, select SQL Preview in the menu at the end of the toolbar. The preview can't be edited.
To run the query, click the first toolbar button, which copies the query to the SQL editor and executes it. To change the query, switch back to the Query Builder.
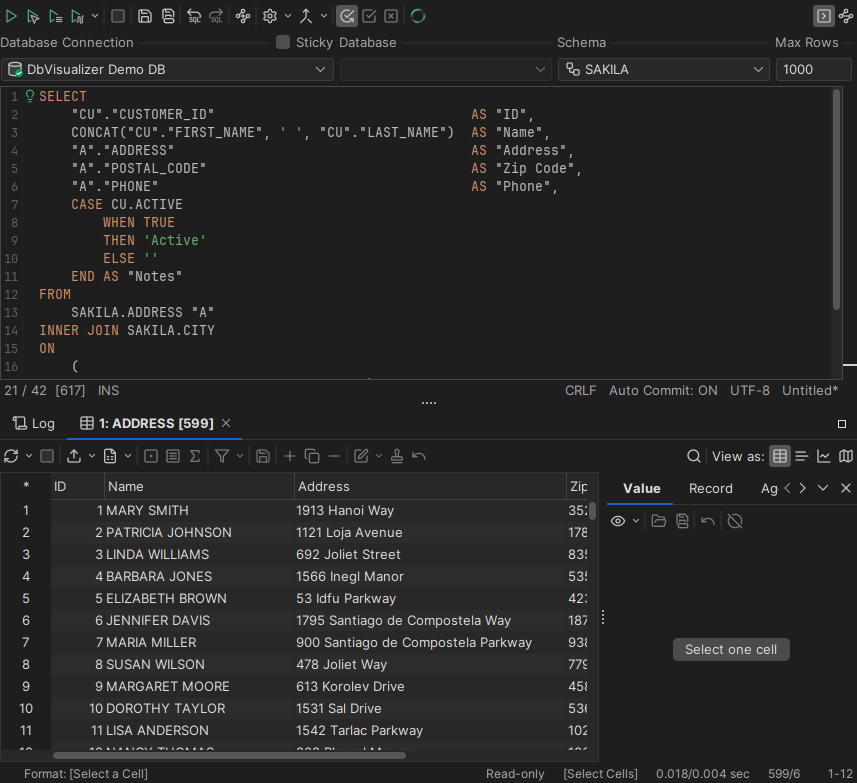
Editing an existing query
To edit a query from the SQL editor in the Query Builder, click Load SQL into the Query Builder in the editor toolbar.
The Query Builder doesn't support everything in a SELECT statement, such as comments, UNION and database-specific keywords. Those parts are left out, and a warning is shown. Compare the SQL preview with your original query to see what was left out.
Query Builder settings
You can change these settings for a database type (the Database tab in Tools → Tool Properties) or for a connection (the Properties tab of the connection's Object View tab).
JOIN clauses or WHERE conditions
By default, joins are written as JOIN clauses. To write them as WHERE conditions instead, clear Generate JOIN Clause in Query Builder in the Query Builder category.
A join as a JOIN clause:
FROM SAKILA.CITY
INNER JOIN SAKILA.COUNTRY
ON ( SAKILA.CITY.COUNTRY_ID = SAKILA.COUNTRY.COUNTRY_ID );
The same join as a WHERE condition:
FROM SAKILA.CITY, SAKILA.COUNTRY
WHERE ( SAKILA.CITY.COUNTRY_ID = SAKILA.COUNTRY.COUNTRY_ID );
In a WHERE condition, left and right joins use database-specific syntax, such as (+) in Oracle and *= or =* in SQL Server and Sybase. DbVisualizer uses the right syntax for the database. If a join can't be written as a WHERE condition, such as a full join, or a left or right join in a database without such syntax, JOIN clauses are used instead.
Qualifiers and delimited identifiers
To qualify table names with the schema or database name, and column names with the table name, use the Qualifiers category. To put quotes around names with mixed case or special characters, use the Delimited Identifiers category.
Limitations
- Unions and subqueries aren't supported.
- When you load a query from the SQL editor, comments, unsupported keywords and unsupported clauses are left out, with a warning.
- Everything between
CASEandENDis kept as it is. The qualifier and delimited identifier settings don't apply to the names in it.