Editing SQL Scripts
The editor in SQL Commander works like other text editors, and it also has features for SQL: auto completion of keywords, table and column names, statements generated from database objects, and ways to select, find and fold statements. This page describes those features. To open and save scripts, see Opening and Saving Scripts, and to change fonts, colors and key bindings, see Customizing the SQL Editor.
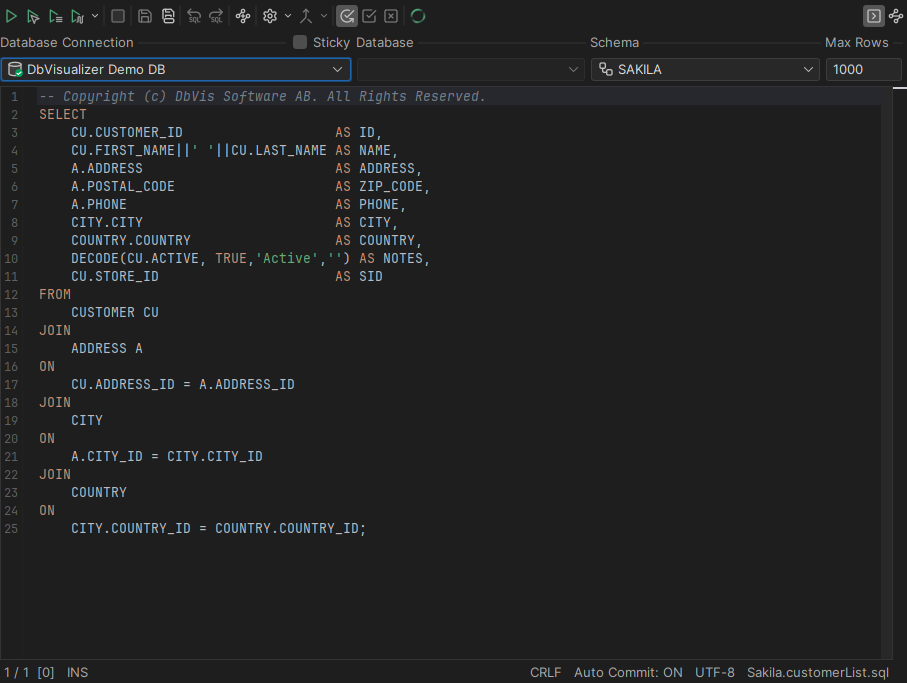
The editor status bar
The status bar below the editor shows, from left to right:
| Field | Description |
|---|---|
| Position | The caret position as <line> / <column> [<position from top>]. The position from the top helps when an error message gives the position as a single number. |
| Typing mode | INS when the text you type is inserted, OVR when it overwrites the text after the caret. To switch, press Insert. |
| Macro | Shown only when you record or play a macro. |
| File format | The line breaks of the file, LF or CRLF. Click it to choose the line breaks to use when you save the file. |
| Auto commit | Whether auto commit is on. |
| Character set | The character encoding of the file. Click it to choose the encoding to use when you save the file. |
| File | The name of the file, or Untitled for a new script. An asterisk (*) after the name means that there are unsaved changes. Click the name to copy the file path or open the folder of the file. |
Using auto completion
Auto completion suggests keywords, table and column names, and client-side commands as you write. To show the suggestions, press Ctrl+Space. Select a suggestion by double-clicking it, or by pressing Enter or Tab. To close the list, press Esc.
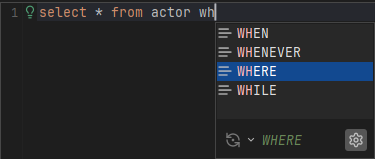
The suggestions depend on where the caret is. Where a keyword can be written, the list shows the keywords for the database type of the connection selected above the editor.
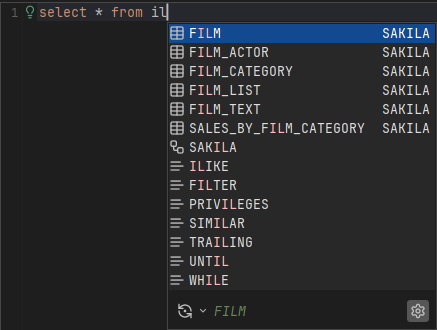
Where a table name can be written, the list shows tables and views, and also databases and schemas. You must be connected to the database. Here, the list shows the schemas, tables and keywords that contain IL:
Where a column name can be written, the list shows the columns of the tables in the statement. When you select from several tables, columns that can be joined are suggested as join conditions.
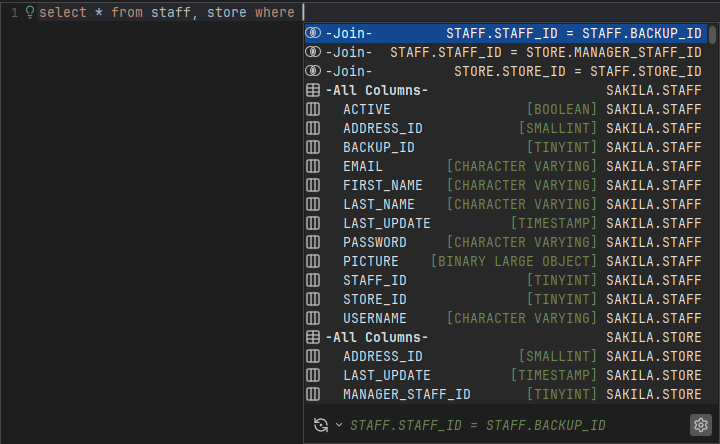
For client-side commands, the list shows the commands, their parameters and the values of the parameters. For @export set, only the parameters for the selected Format are listed.
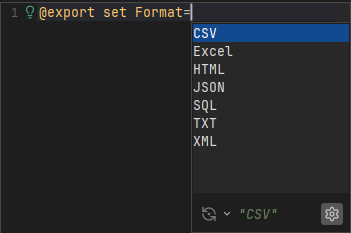
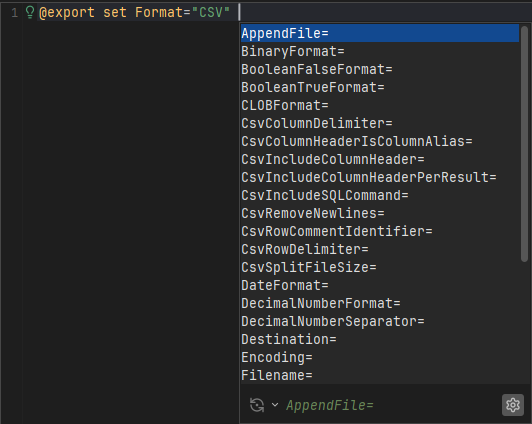
Table and column names are suggested in SELECT, INSERT, UPDATE, DELETE, ALTER and DROP statements. Keep in mind:
- Separate the statements in the editor using the statement delimiter, by default
;. - Columns are only suggested when the statement already has a table name.
- The Database and Schema lists above the editor limit the tables that are suggested.
- The names are cached, so that the list is shown quickly. After you create or change objects, refresh the cache using the button at the bottom of the list.
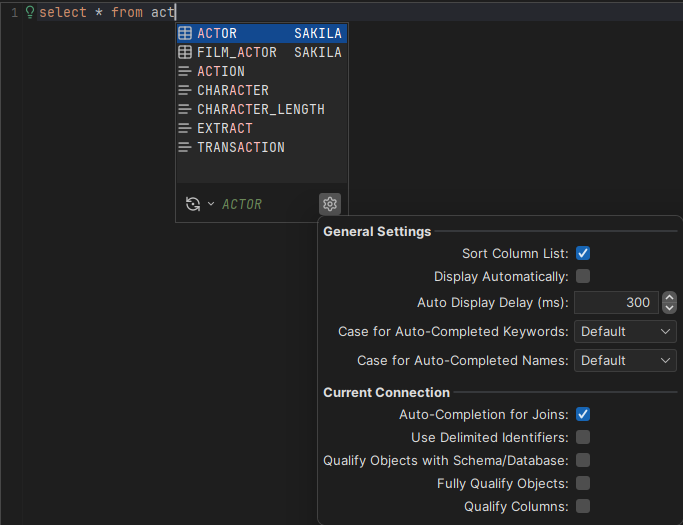
At the bottom of the list, you also see a preview of the text to insert, and you can open the auto completion settings.
Changing how auto completion works
- To show the suggestions automatically as you type, and to change the sorting and the letter case, use the General / SQL Commander / Auto-Completion category in Tools → Tool Properties. Forcing a letter case may give invalid SQL.
- To qualify table names with the schema name, or to put quotes around them, use the Qualifiers and Delimited Identifiers categories in the connection properties. Names that are ambiguous or invalid are always qualified or quoted.
- Finding join conditions can be slow for some databases. To turn the join suggestions off, clear Auto-Completion for Joins in the SQL Editor category of the connection properties.
Generating SQL for an object
To write SQL for a database object, such as a table, view or procedure, drag its node from the Databases tab to the editor. The Script Object dialog opens, where you choose what to insert, for example a SELECT or CREATE statement for the object, or only its name. The choices depend on the type of object.
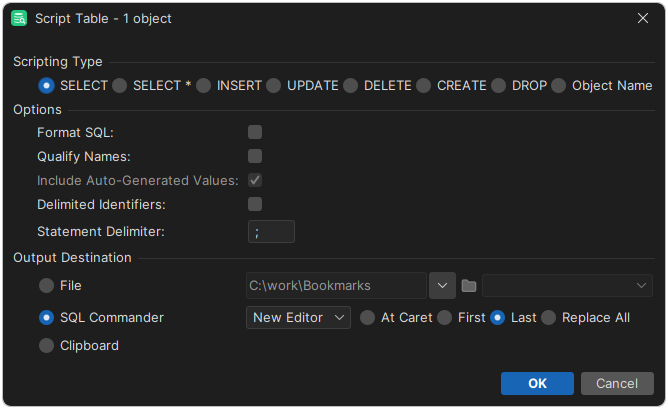
In the Options area, you can format the SQL, use qualifiers and quoted identifiers, and change the statement delimiter. By default, the text is inserted in the SQL Commander tab where you dropped the object, but you can choose another destination and where to insert the text.
You can also open the dialog from the right-click menu of the object in the Databases tab.
To insert only the names of the objects, hold down Ctrl (Alt on macOS) while you drag them.
To make this the default, change Drop Database Objects in SQL Editor in the General / SQL Commander category in Tools → Tool Properties.
Selecting statements
To select the statement at the caret, or the next or previous statement, right-click in the editor and select Selection → Select Current Statement, Select Next Statement or Select Previous Statement. The actions also have keyboard shortcuts.

Editing multiple lines at once
Using multiple carets, you can edit several lines at the same time, for example to add the same text to the beginning of each line:
- Hold down
Alt(Optionon macOS) and drag the mouse over the lines. A caret is added on each line. If you also drag left or right, the same columns are selected on each line. - Type, delete or paste text. The change is made on all the lines.
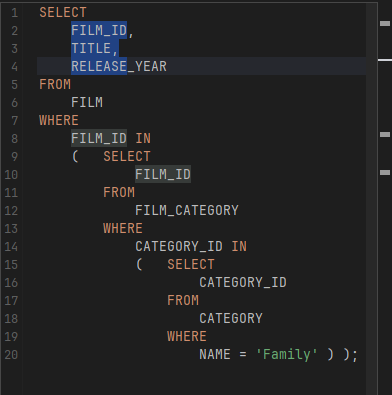
If you paste several lines of text, each line is pasted at its own caret. You can extend or shrink the selection using Shift and the arrow keys.
To return to a single caret, press Esc, click in the editor, or press an arrow key without holding Shift.
To use Ctrl instead of Alt, change the Multi-Caret Modifier Key setting in Tools → Tool Properties, in the General / SQL Commander / Editor category.
Finding and replacing text
To find text in the editor, select Find in the Edit menu or the right-click menu of the editor, or press Ctrl+F (Cmd+F on macOS). To replace text, select Replace, or press Ctrl+R (Cmd+R on macOS).
Find opens a bar at the top of the editor. Type the text to find in the Search field. Use the buttons next to it to match the case (Match Case), match whole words (Match Word), use a regular expression (Match Regexp), search only in the selected text (Find in Selection), or highlight all matches (Mark All). The matches are highlighted as you type. To move between them, use Find Next and Find Previous, press F3 and Shift+F3, or use the Down and Up arrow keys.

Replace adds a Replace field for the new text, with the Replace and Replace All buttons.

With a regular expression, you can use its groups in the replacement text: $1 is the first group, $2 the second, and so on.
For example, to qualify the column names in this statement with the table name:
SELECT
    firstname,
    lastname
FROM
    person;
- Select Match Regexp, and clear Match Word.
- In the Search field, enter
^(\s+)(\w+)(,?)$. - In the Replace field, enter
$1person.$2$3. - Click Replace All.
The result is:
SELECT
    person.firstname,
    person.lastname
FROM
    person;
Highlighting matches
To highlight all occurrences of a text in the editor, select it. The text must be at least three characters long and contain a letter or a digit.
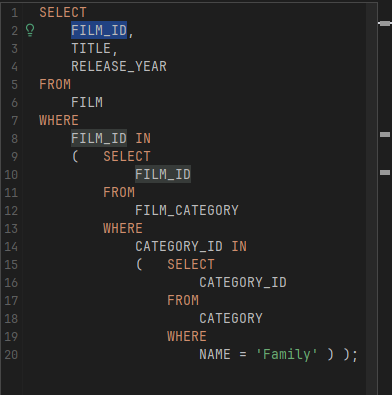
To turn the highlighting off, clear Enable/Disable Auto Highlight in the General / SQL Commander / Editor category in Tools → Tool Properties. To change the colors, use the General / Appearance / Editor Styles category.
Folding statements
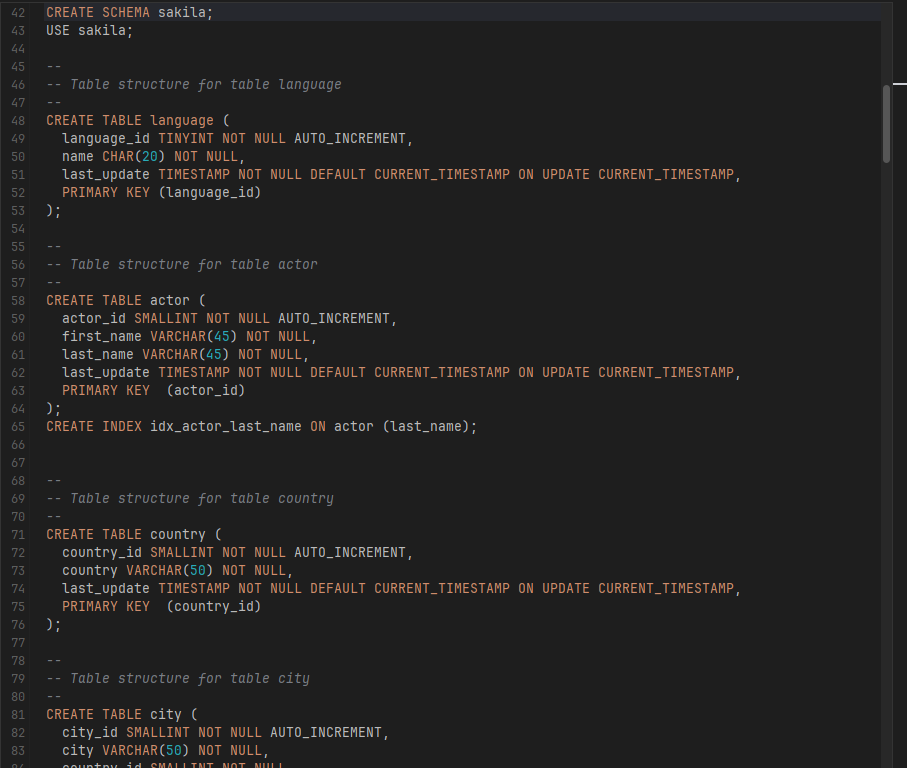
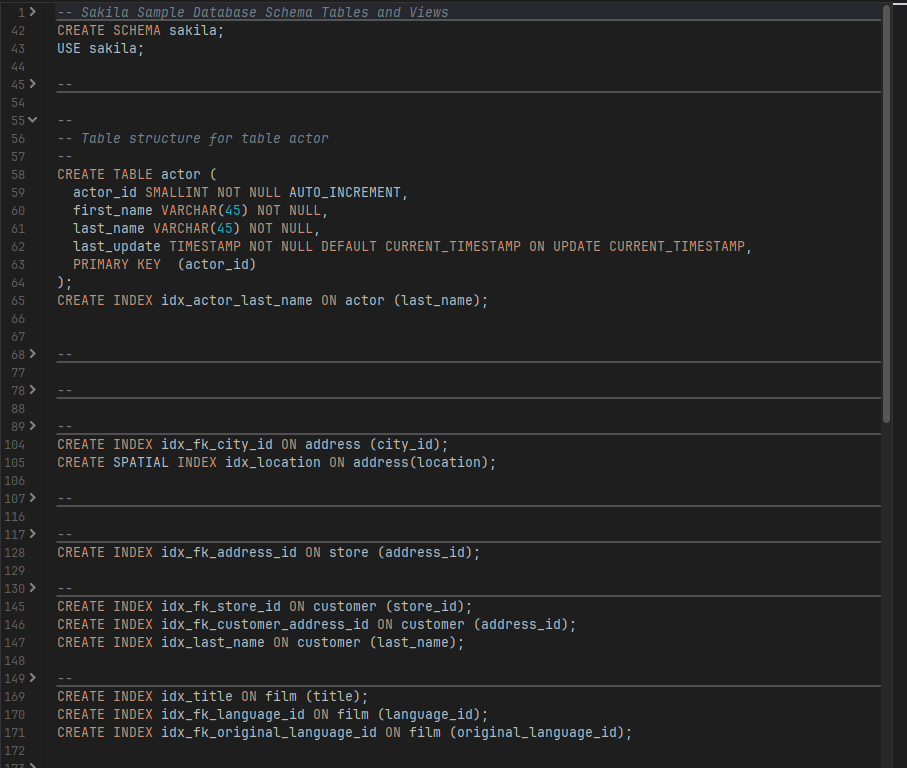
To hide statements in a long script, right-click in the editor and select Folding → Toggle Folding. Then click the buttons next to the line numbers to collapse or expand a statement.
Recording and playing macros
If you repeat the same edits many times, record them as a macro and play the macro as often as you need. Start and stop the recording, and play the macro, from the right-click menu, or using the keyboard shortcuts. The status bar shows when a macro is recorded and when one is available.
Mouse actions and searches aren't recorded.
Example: converting lines to INSERT statements
You have these lines of text, and you want to turn each line into an INSERT statement:
12345 123456
89012 890123
45678 456789
- Place the caret at the beginning of the first line, and start recording a macro.
- Type
INSERT INTO mytable VALUES('. - Use Insertion Point to Next Word, and type
',. - Use Insertion Point to Next Word, and type
'. - Use Insertion Point to Next Word, and type
');. - Use Insertion Point Down and Insertion Point to Beginning of Line.
- Stop the recording.
The first line is now a statement, and the caret is at the beginning of the second line. Play the macro once for each of the other lines. The result is:
INSERT INTO mytable VALUES('12345', '123456');
INSERT INTO mytable VALUES('89012', '890123');
INSERT INTO mytable VALUES('45678', '456789');
Formatting SQL
Only in DbVisualizer Pro
This feature is only available in the DbVisualizer Pro edition.
To format the SQL in the editor, use the Format SQL submenu in the SQL Commander menu or in the right-click menu. See Formatting SQL.
Using the AI Assistant
Only in DbVisualizer Pro
This feature is only available in the DbVisualizer Pro edition.
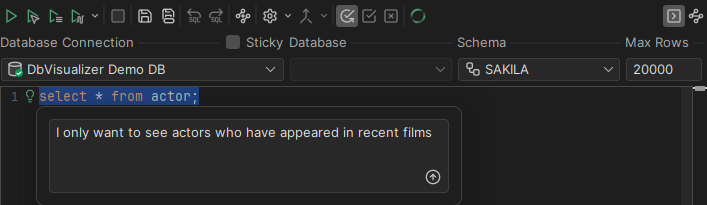
When the AI Assistant is turned on, it can help you write, change and fix scripts. Select Ask AI in the toolbar or the right-click menu, or press Ctrl+Shift+H (Cmd+Shift+H on macOS). In the window that opens, ask about the selected text or the statement at the caret. If the caret isn't in a statement, describe what you want, and the AI Assistant writes the SQL. The selected database connection is included in the context.
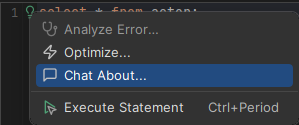
When the caret is in a statement, a light bulb is shown in the left margin. Click it to Optimize the statement, Chat About it or Execute Statement. If the statement failed, you can also select Analyze Error.
Going back to earlier scripts
When you execute a script, it is saved in the SQL history. To load earlier scripts in the editor, use Load Previous History Entry and Load Next History Entry in the editor toolbar. See Re-Executing SQL Statements.